
Tutorial · Heads & faces
How to draw an anime face, step by step
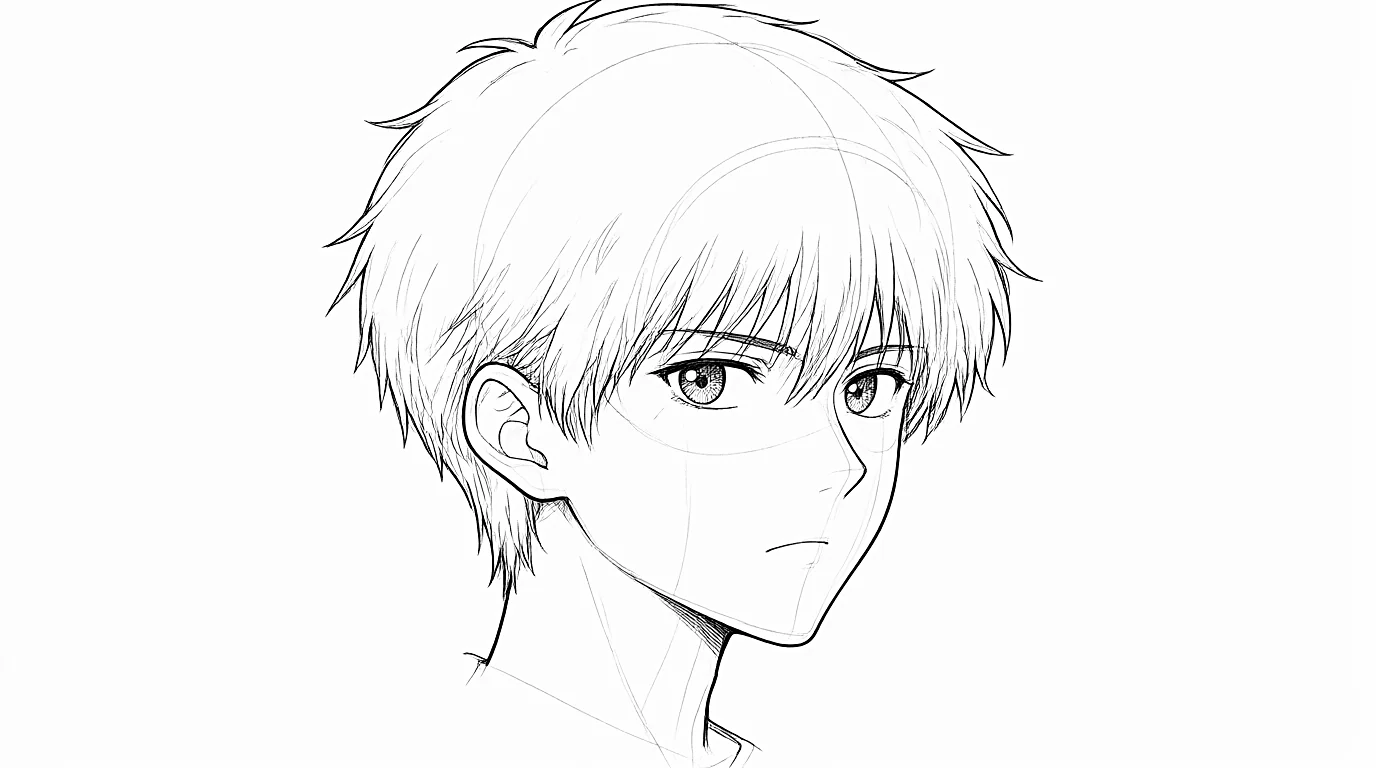
To draw an anime face, build the head first: a sphere for the skull, a slice cut off its side, a curved axis down the middle of the face, then the jaw down to a thin chin. Then place the features on those guides: the eyes on the eye line halfway down the head, the nose halfway between the eyes and the chin, the mouth a third of the way from the nose to the chin, and the hair as a mass around the skull.
- Beginner
- 40 min practice
- 9 min read
- Updated
You'll need
- HB pencil
- 2B pencil for the final lines
- Eraser
- Printer paper or a sketchbook
Key takeaways
- A manga head is not a flat circle: it is a ball you carve, always in the same 4 steps: the skull, the side plane, the axis of the face, the jaw and chin.
- When the head turns, draw the axis of the face first: it decides where the eyes, the nose and the mouth go.
- Eyes halfway down the head, nose halfway between the eyes and the chin, mouth a third of the way from the nose to the chin.
- Hair is a mass a little bigger than the skull, cut into big locks that start from the parting.
On this page
What makes a face look anime?
An anime face is a real face simplified. The eyes get bigger and more detailed, while the nose shrinks to a small wedge or a single mark and the mouth to one to three strokes. The cheeks and the jaw become one smooth curve that ends in a thin, slightly pointed chin.
Because so much is left out, every line you keep has to be in the right place. That is why anime artists build the head first and only then add the features: a small eye drawn on the wrong line is noticed right away, while a perfect eye on a misbuilt head still looks wrong.
- Big eyes on a line halfway down the head, about one eye's width apart.
- A small nose, often just the shaded side or the underside of a little wedge.
- A small mouth, closer to the nose than to the chin, narrower than the space between the eyes.
- A simple jaw that goes from the sides of the skull to a thin chin.
- Hair drawn as a mass that sits around the skull, not glued to it.
Anime face proportions
These proportions are a starting point, not a law. Learn them from the front, then bend them to fit your character: younger characters get lower eyes and a shorter chin, adults a longer face and a stronger jaw.
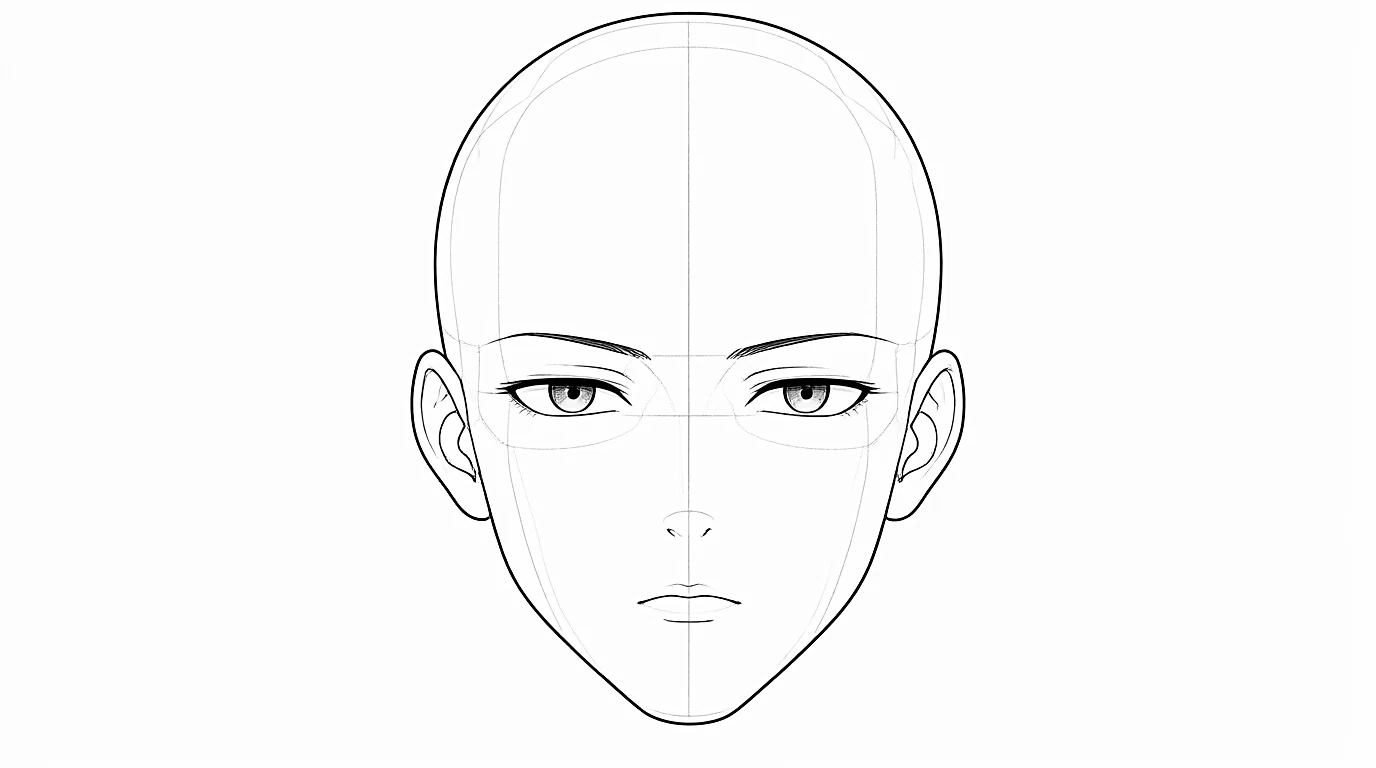
- Eyes: on the eye line, halfway between the top of the skull and the chin, with one eye's width between them. Lower, the character looks younger.
- Nose: on the center line of the face, halfway between the eye line and the chin.
- Mouth: on the center line too, closer to the nose than to the chin, a third of the way from one to the other.
- Ears: on the side plane of the skull, roughly from the eye line down to the bottom of the nose.
- Eyebrows: about half an eye above the eyes, following the brow ridge.
How to draw an anime face step by step
This is the method of the first week of the SketchAI program: the head as a volume, then one feature a day. The construction is shown in a three-quarter view, the most useful angle to learn, but it works the same from the front and in profile. Keep every line light until the last step.
-
Step 1Draw the skull: a sphere
Draw a circle, or a slightly egg-shaped one, for the skull. It is the main volume of the head, and everything else hangs on it. Draw it in one or two loose strokes: it is a volume, not the outline of the face.
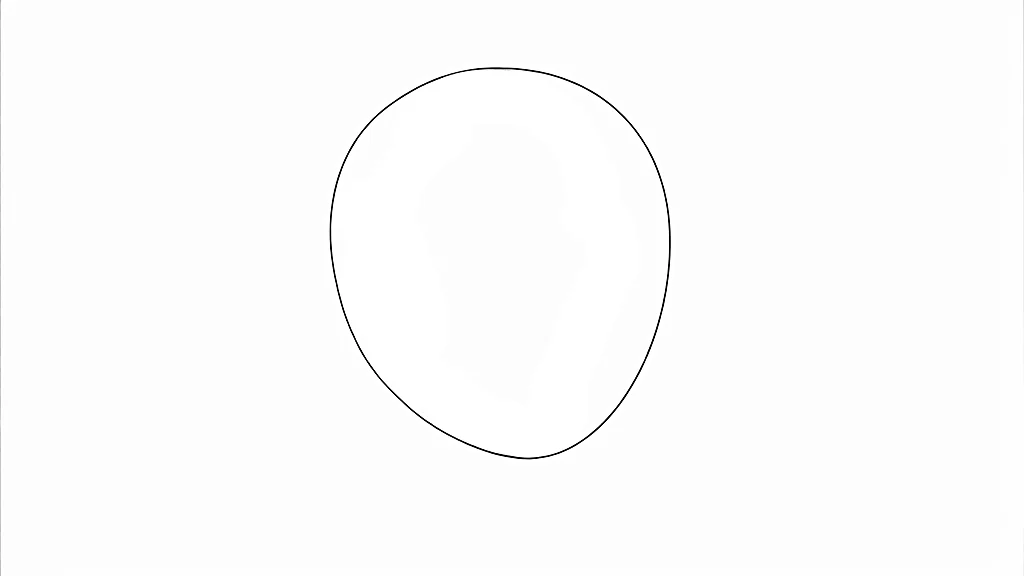
The skull: a sphere or an egg shape, drawn lightly. -
Step 2Cut the side plane and draw the axis
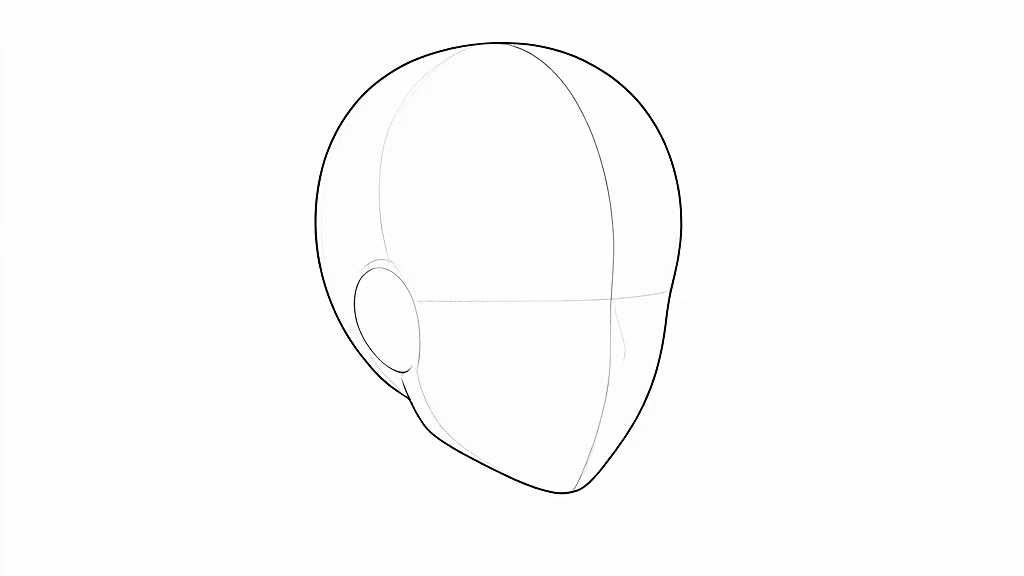
Cut a slice off the side of the sphere: this flat oval is the temple, where the ear will go. Then draw the axis of the face, a curved vertical line down the middle of the face. It follows the turn of the head, so on a three-quarter view it curves around the ball.
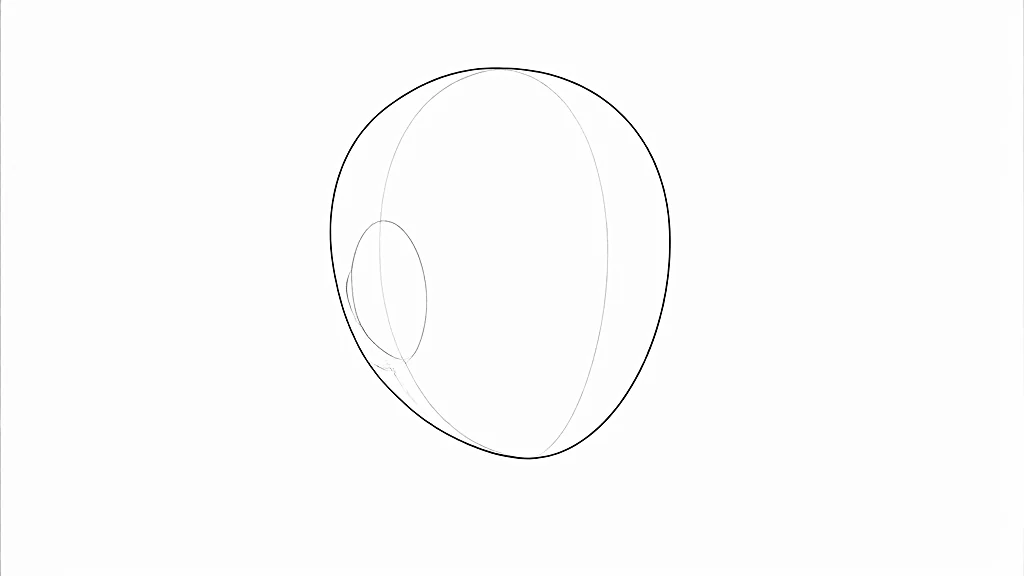
The side plane cut off the side of the skull, and the curved axis of the face. -
Step 3Draw the eye line and the jaw
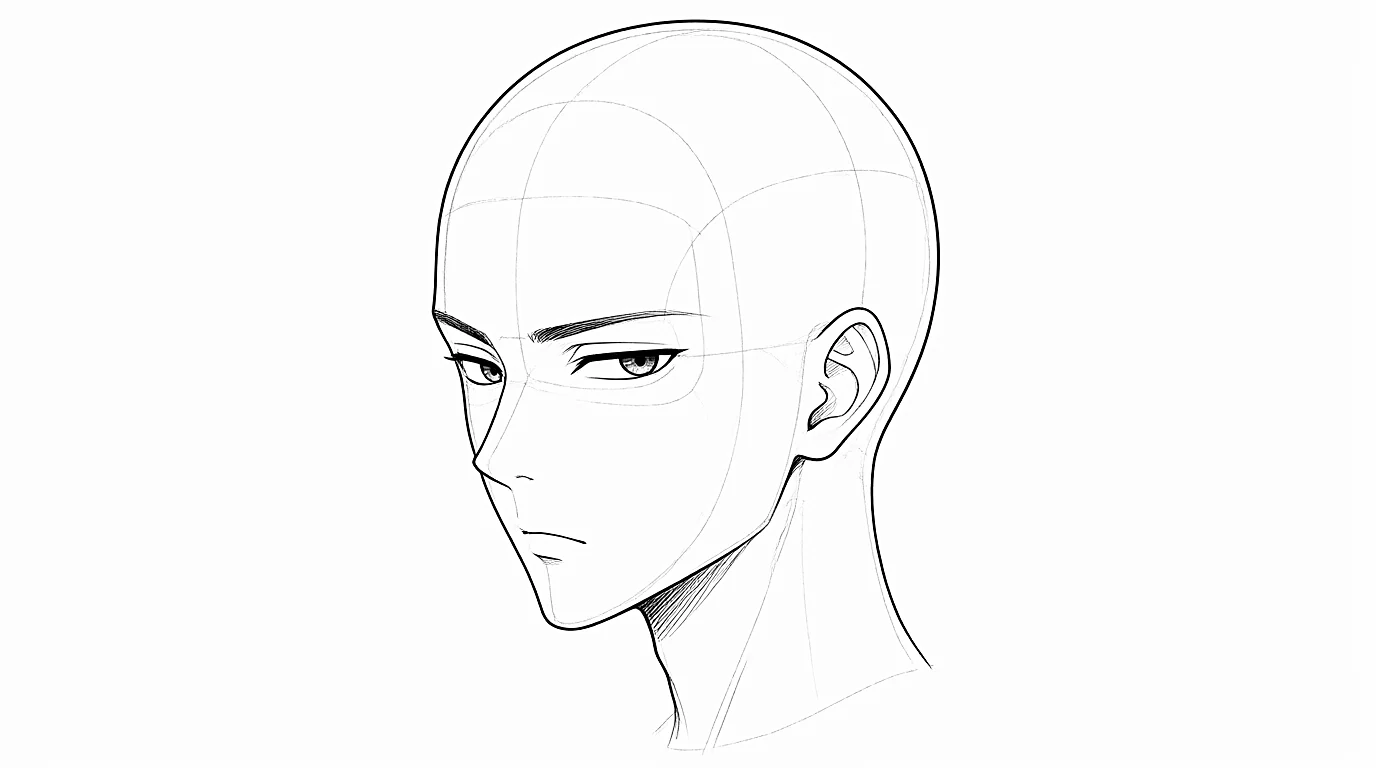
Draw the eye line halfway down the head: it follows the surface of the face and turns with it. Then come down from each side of the skull to the chin, on the extension of the axis. In manga, the chin is thin and a little pointed.
The eye line wrapping around the head, and the jaw coming down from the skull to the chin. -
Step 4Place the eyes
Build the eyes on the eye line, one eye's width apart: a lying almond, a thick upper eyelid, a tall oval iris, then the pupil and the highlights, as in the anime eyes tutorial. In three-quarter view, the far eye gets narrower and moves closer to the nose.
Eyes placed on the curved eye line of a head in three-quarter view: the far eye is narrower. -
Step 5Add the nose: a small wedge
On the axis, halfway between the eye line and the chin, sketch a small wedge: a long triangle for the bridge and a small flat underside. Choose where the light comes from and ink only the shaded side, or only the underside, then erase the rest. In three-quarter view, the tip sticks out a little past the axis, toward the way the head turns.
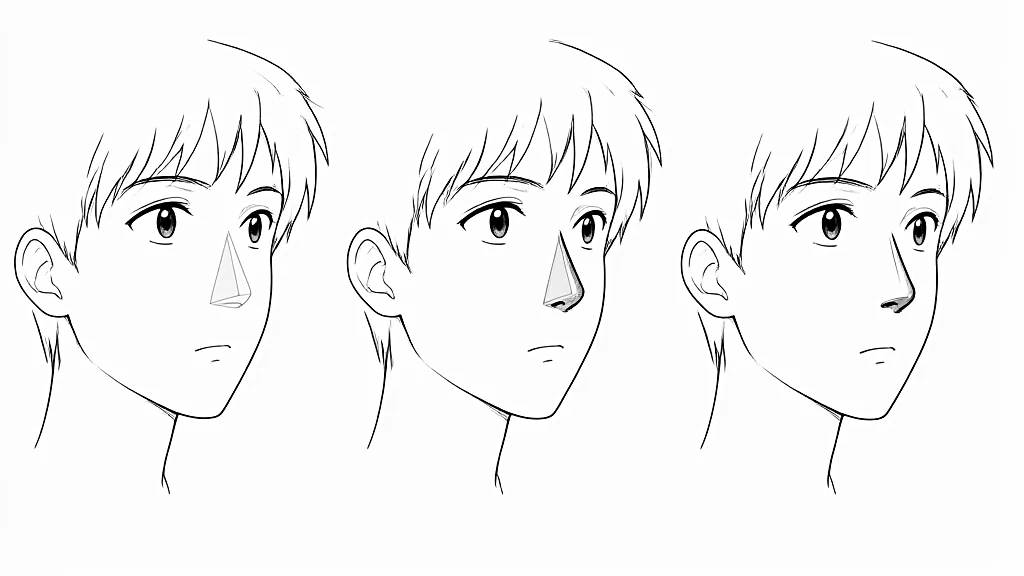
The nose sketched as a small wedge on the center line, then inked on one side only. -
Step 6Add the mouth
On the axis, a third of the way from the nose to the chin, draw a slightly curved stroke, narrower than the space between the eyes, and a short stroke under it for the lower lip. In three-quarter view, the far side of the mouth gets shorter; in profile, only a small notch remains under the nose.
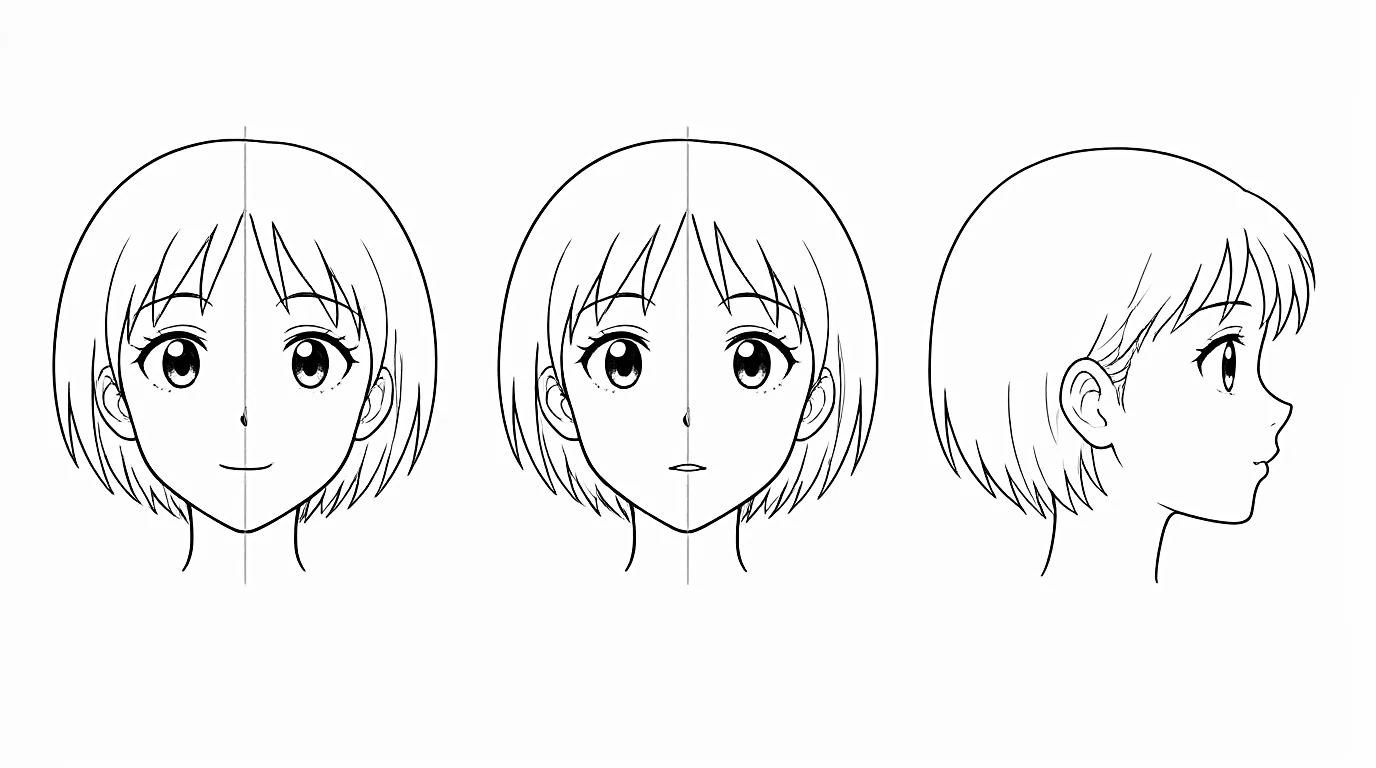
The mouth on the center line, from the front, in three-quarter view and in profile. -
Step 7Draw the hairline, the ears and the hair
Draw the ear on the side plane. Mark the hairline along the top of the forehead, coming down in front of the ear. Then draw the mass of the hair a little bigger than the skull, choose the parting and cut the mass into a few big pointed locks that start from it, as in the anime hair tutorial.
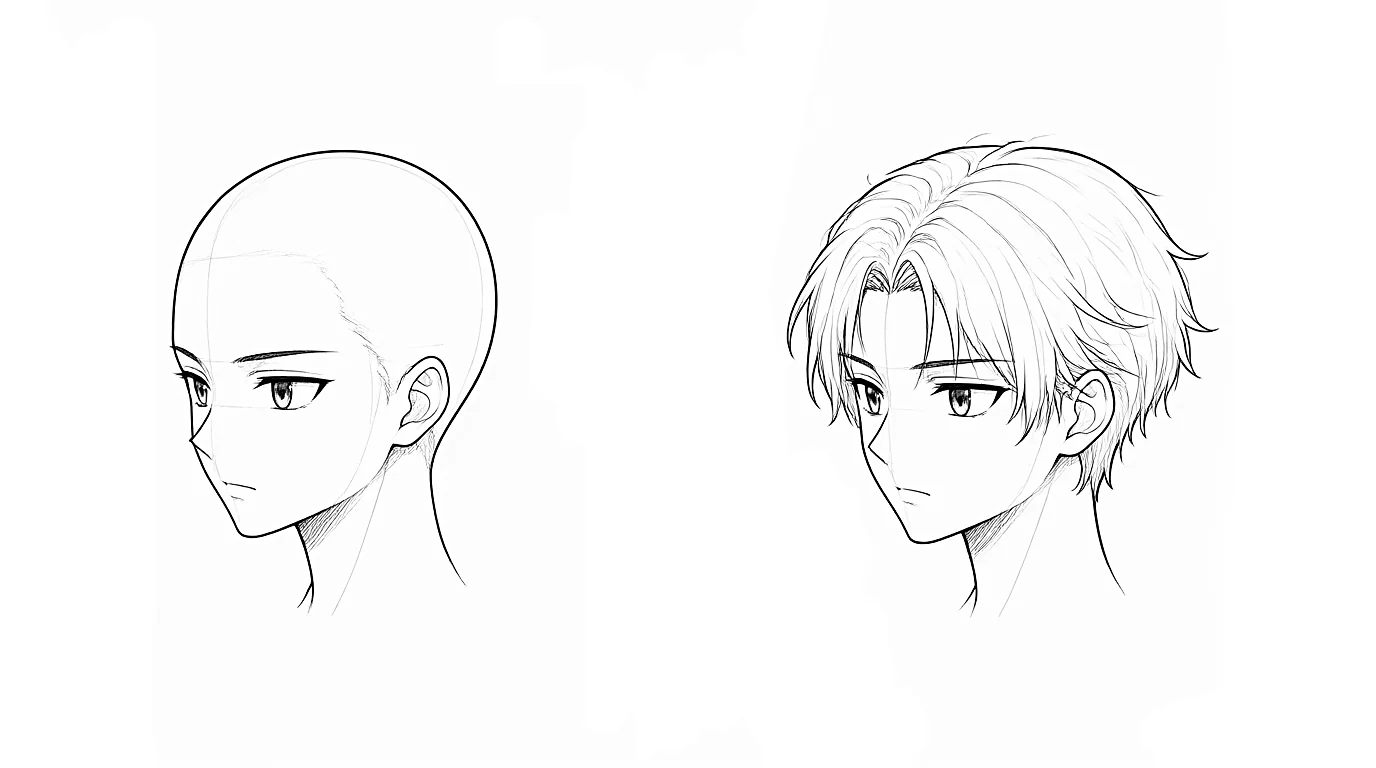
A head with its hairline, then the same head with hair drawn as a mass around the skull. -
Step 8Clean up the lines
Erase the construction lines, then go over the final lines with a darker pencil. Press harder on the outer contour, the upper eyelids and the hair, and keep the nose and the mouth light.
If your mouth has more than three strokes, remove some: it will look more manga.
How to draw the nose and the mouth
The same small wedge gives three different noses, depending on what you keep. Choose by the character's age and style, and keep the same type of nose from every angle: it helps people recognize the character.
The mouth sets the mood with its corners. To open it, the line opens into a shape: a tiny oval for a mouth slightly open, a D shape lying down for a smile, rounder and taller for a shout. Draw the teeth as a simple white band under the top of the mouth, and the tongue as a curve at the bottom.
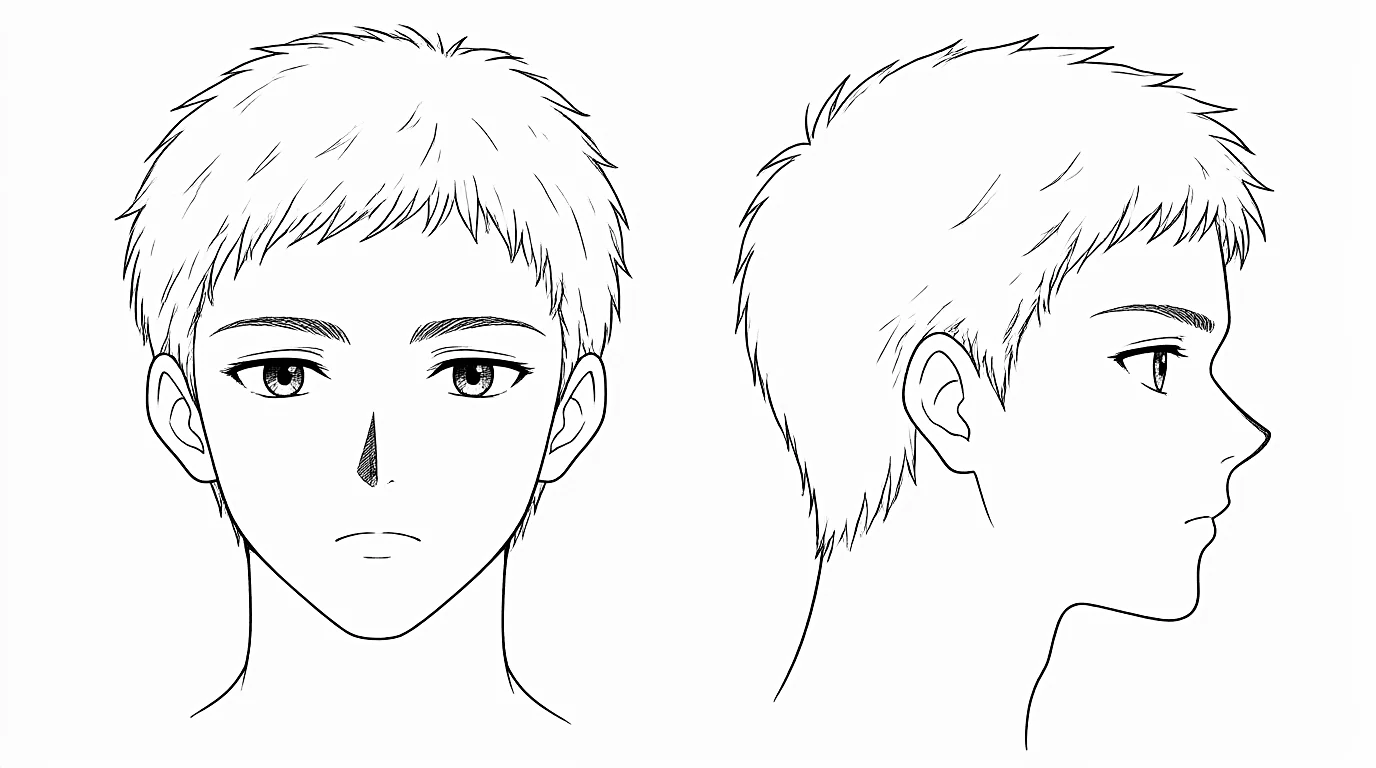
- The dot: a dot or a tiny line under the tip, for cute characters and children.
- The triangle: the shaded side and the underside form a small triangle, for teens and adults.
- The drawn nose: the bridge, the tip and the nostrils, for realistic styles and older characters.
How to draw male, female, young and older faces
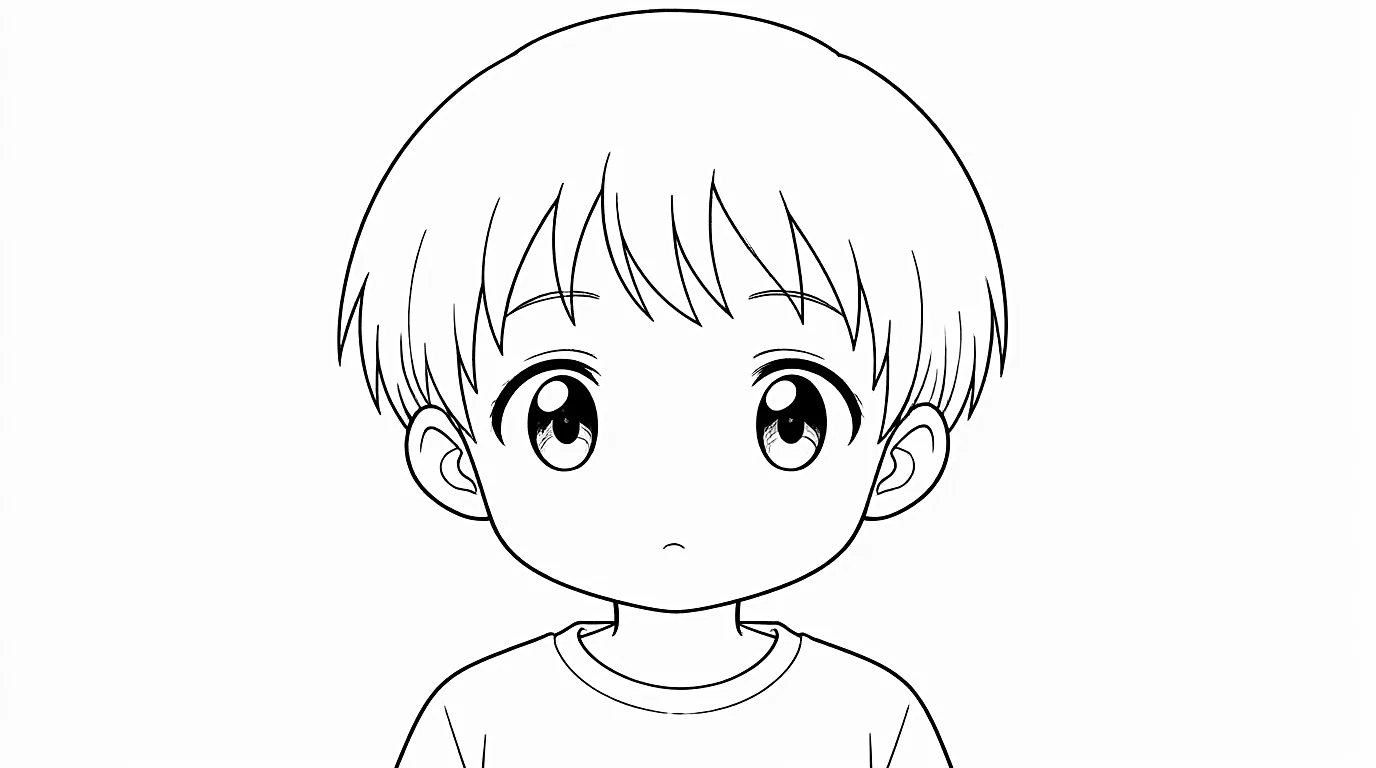
The construction stays the same; the differences live in a few shapes. Many styles give male characters a longer face, a wider and more angular jaw, narrower eyes and thicker eyebrows. Female characters often get a rounder face, a smaller chin, bigger eyes with heavier lashes and thin eyebrows.
Age matters as much as gender. A child has the roundest face, the lowest eyes and a dot for a nose; a teen gets a small triangle nose; an adult a longer face, a stronger jaw and a nose that is drawn.
How to draw the face from the side and at an angle
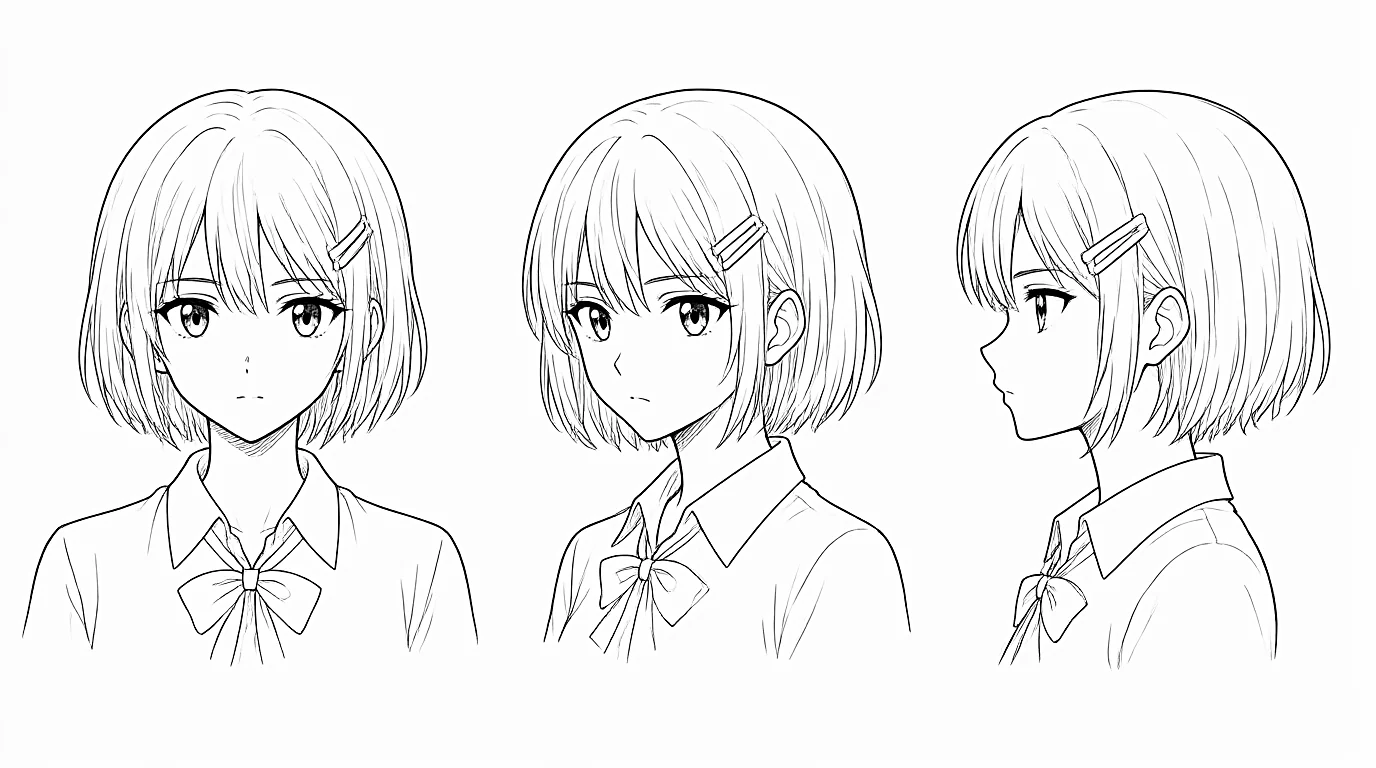
Keep the same construction for every angle. In three-quarter view, the axis moves toward the far side and curves around the head, the far eye narrows and the nose sticks out past the axis. In profile, the axis becomes the outline of the face: the brow, the nose, the mouth and the chin all sit on it, the eye becomes an arrowhead and the mouth a small notch under the nose.
The best practice is to draw one character from the front, in three-quarter view and in profile, side by side. Draw long horizontal lines across the page: they keep the eyes, the nose and the mouth at the same height on all three. The head from any angle tutorial goes further with views from above and below.
Common mistakes when drawing anime faces
Before you darken anything, check that the head is correctly oriented. Most faces that look wrong were built too fast.
- Starting with the eyes: without a head built first, the features end up crooked or at the wrong height. Build the skull, the side plane, the axis and the jaw first.
- A flat face: the axis and the eye line drawn straight on a turned head. Let them curve around the ball.
- A mouth too low: anime mouths sit closer to the nose than to the chin.
- A nose that floats: always sketch the whole wedge lightly, even for a one-stroke nose. It is what puts it in the right place.
- Hair glued to the skull: hair has thickness, so its mass sits outside the skull. Sketch it before the first lock.
Build 3 heads following the same 4 steps, one from the front, one in three-quarter view and one in profile, then draw one head in 1 minute, construction included, twice. It is day 1 of the SketchAI program, and the habit that makes every face you draw afterwards easier.
Frequently asked questions
How do you draw an anime face for beginners?
Build the head first in 4 steps: a sphere for the skull, the side plane, a curved axis down the face and the jaw to a thin chin. Then place the eyes on the eye line, the nose and the mouth on the axis, the ears on the side plane and the hair around the skull.
Where do the eyes go on an anime face?
On the eye line, halfway between the top of the skull and the chin, with about one eye's width between them. Lower, the character looks younger.
What are the proportions of an anime face?
As a starting point: the eyes halfway down the head, the nose halfway between the eye line and the chin, the mouth a third of the way from the nose to the chin, and the ears on the side of the head, from the eye line to the bottom of the nose.
How do you draw an anime face from the side?
Use the same construction: in profile, the axis becomes the outline of the face, with the brow, nose, mouth and chin on it. The eye becomes an arrowhead, the mouth a small notch under the nose, and the ear sits on the side plane.
Why does my anime face look flat?
Usually because the guidelines are drawn as straight lines on a turned head. Draw the axis and the eye line as curves that wrap around the skull, and the face will turn with them.
Keep learning
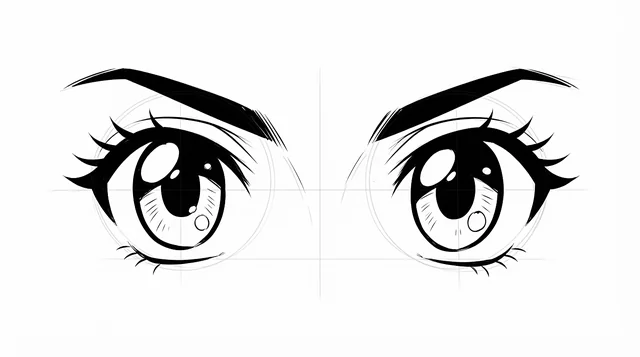 Beginner
How to draw anime eyes, step by step
Build an anime eye in four stages, place it on the face, then change its style and emotion.
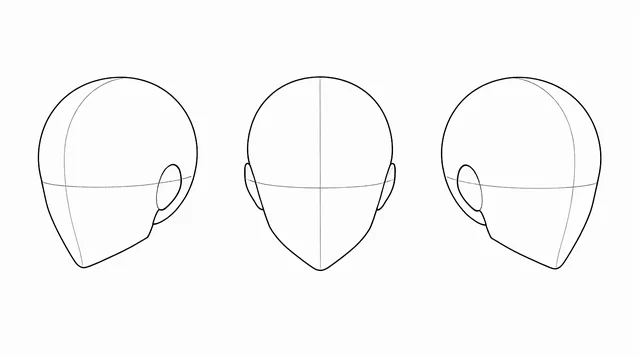 Intermediate
How to draw an anime head from any angle
Turn the head as a volume, then let the eyes, nose and mouth follow it, from the front to the profile.
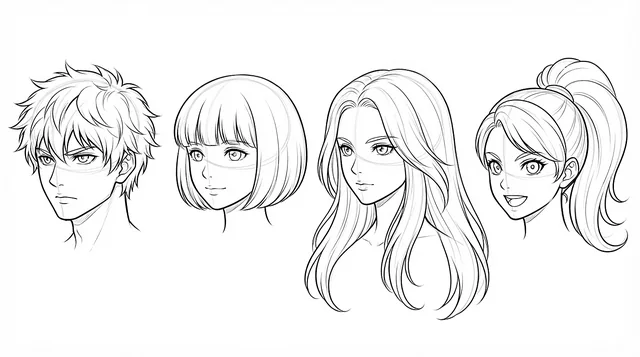 Beginner
How to draw anime hair, step by step
A mass around the skull, big locks from the parting, then spiky, long, curly and tied-up styles.