
Tutorial · Bodies & anatomy
How to draw an anime body, step by step
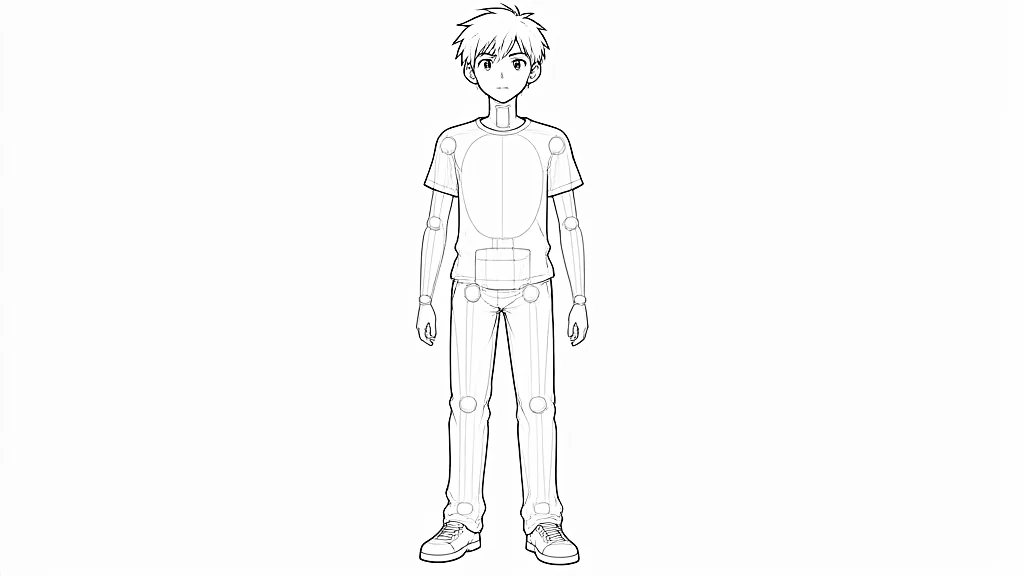
To draw an anime body, measure it with its own head first: a teen is 6 to 7 heads tall, with the crotch in the middle of the body. Then build it in order: landmark lines, a stick figure, the volumes (an egg for the rib cage, a box for the pelvis, the belly between them, two cylinders per limb, balls at the joints), and only then the outline and the clothes.
- Beginner
- 45 min practice
- 8 min read
- Updated
You'll need
- HB pencil
- 2B pencil for the final lines
- Eraser
- A ruler for the landmark lines (optional)
- Printer paper or a sketchbook
Key takeaways
- Measure the character in heads: a teen is 6 to 7 heads tall, an adult 7.5 to 8, a chibi 2 to 3.
- Build the torso with two volumes: an egg for the rib cage, a box for the pelvis, and a gap between them for the belly.
- Limbs are two cylinders and three joints; the legs start from a ball on each side of the pelvis.
- Always follow the same order: lines, stick figure, volumes, then outline and clothes.
On this page
The mannequin method
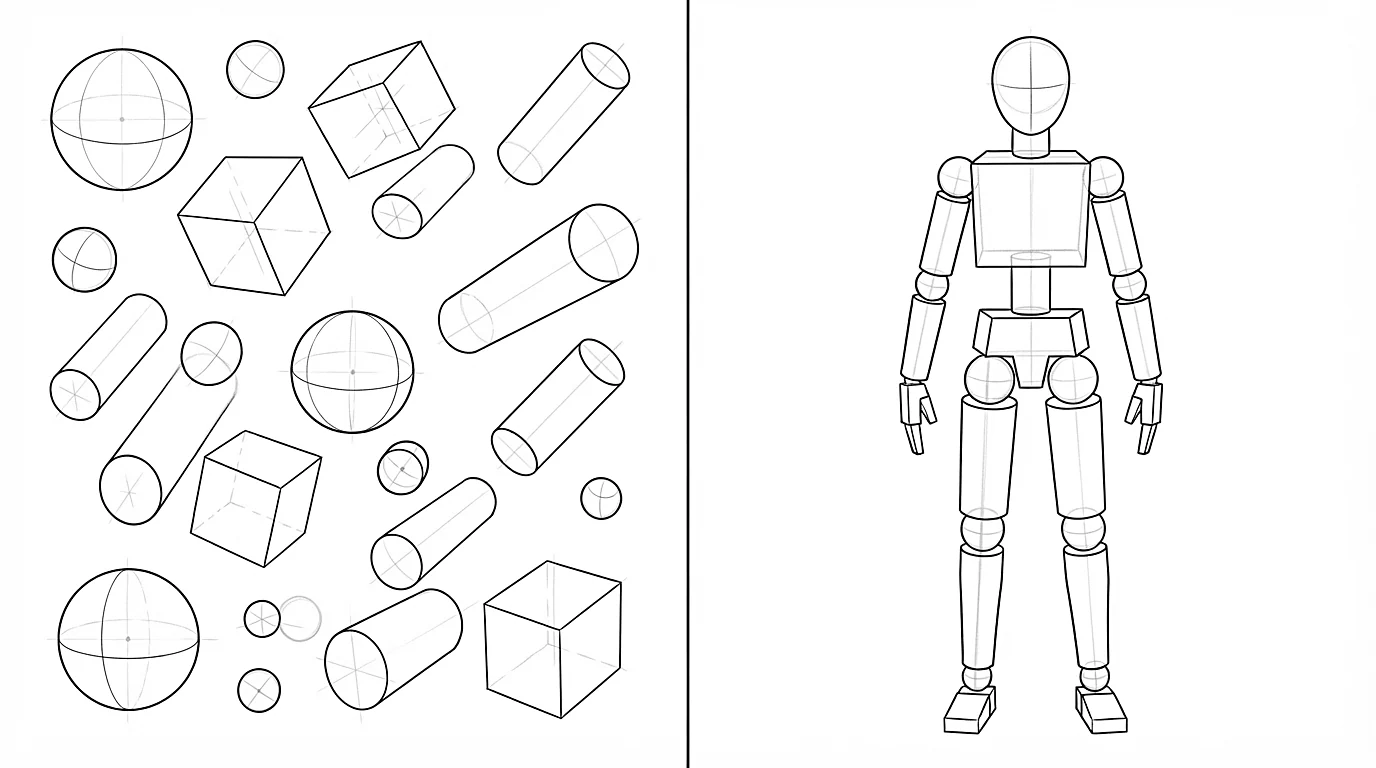
Drawing a body from its outline is the hardest way to do it: you have to guess every curve at once. The mannequin method splits the body into a few simple volumes you can draw, check and move, like an artist's wooden mannequin: a sphere for the head, two volumes for the torso, cylinders for the limbs and balls at the joints.
It rests on one principle: a character is a construction in volume before being a drawing of muscles, clothes or outlines. Once the volumes stand right, the details have somewhere to go. Before muscles and clothes, learn to place the volumes and the joints correctly.
Anime body proportions
To stop getting leg lengths wrong, measure your character with their own head: draw their height, then cut it into head heights, from the top of the skull to the chin. The number of heads changes with the character's age and the style of the manga; keep the same head size to compare, and only the body grows from one age to the next.
On a teen of about 7 heads, these landmarks keep the figure in proportion. Use them as checkpoints once your stick figure is drawn.
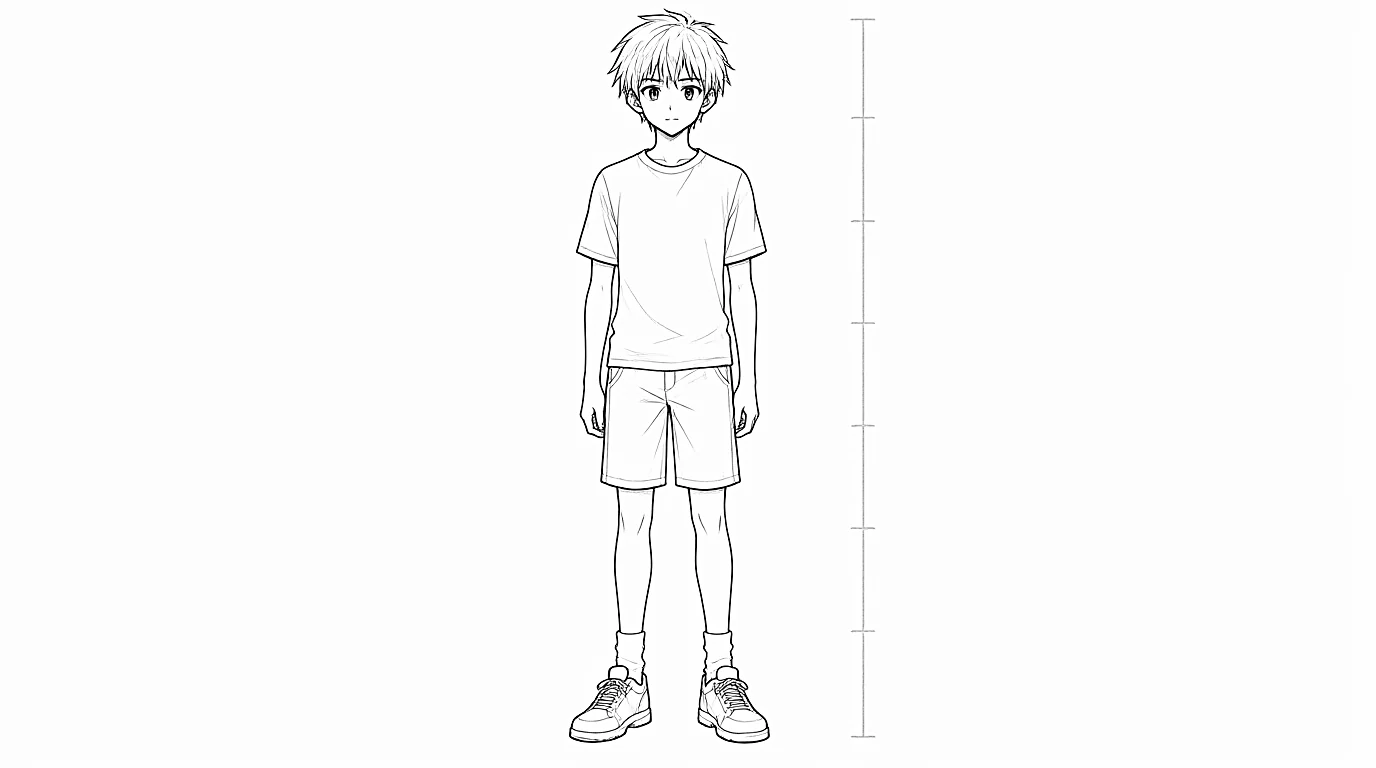
- 2 heads: the chest. 3 heads: the navel. 3.5 heads: the crotch, the middle of the body.
- 5 heads: the knees, halfway between the hip and the foot. 7 heads: the feet.
- The widths: shoulders about 2 heads wide, hips about 1.5 heads.
- The arms: hanging down, the elbow falls at the waist and the fingertips at mid-thigh.
- By age and style: a chibi is 2 to 3 heads, a child 4 to 5, a teen 6 to 7 (the most common in manga), an adult 7.5 to 8, and an action hero up to 9.
The classic trap is legs too short. If your character looks squashed, lengthen the legs, not the torso.
How to draw an anime body step by step
Draw lightly with your HB pencil: every line of the construction will be erased or covered. Start with a standing pose seen from the front, then do the side view next to it, extending each landmark across the page.
-
Step 1Draw the landmark lines
Draw horizontal lines across the page for the landmarks: the top of the head, the chin, the chest, the navel, the crotch, the knees and the feet. They keep the proportions right, and let you draw a side view next to the front view at the same heights.
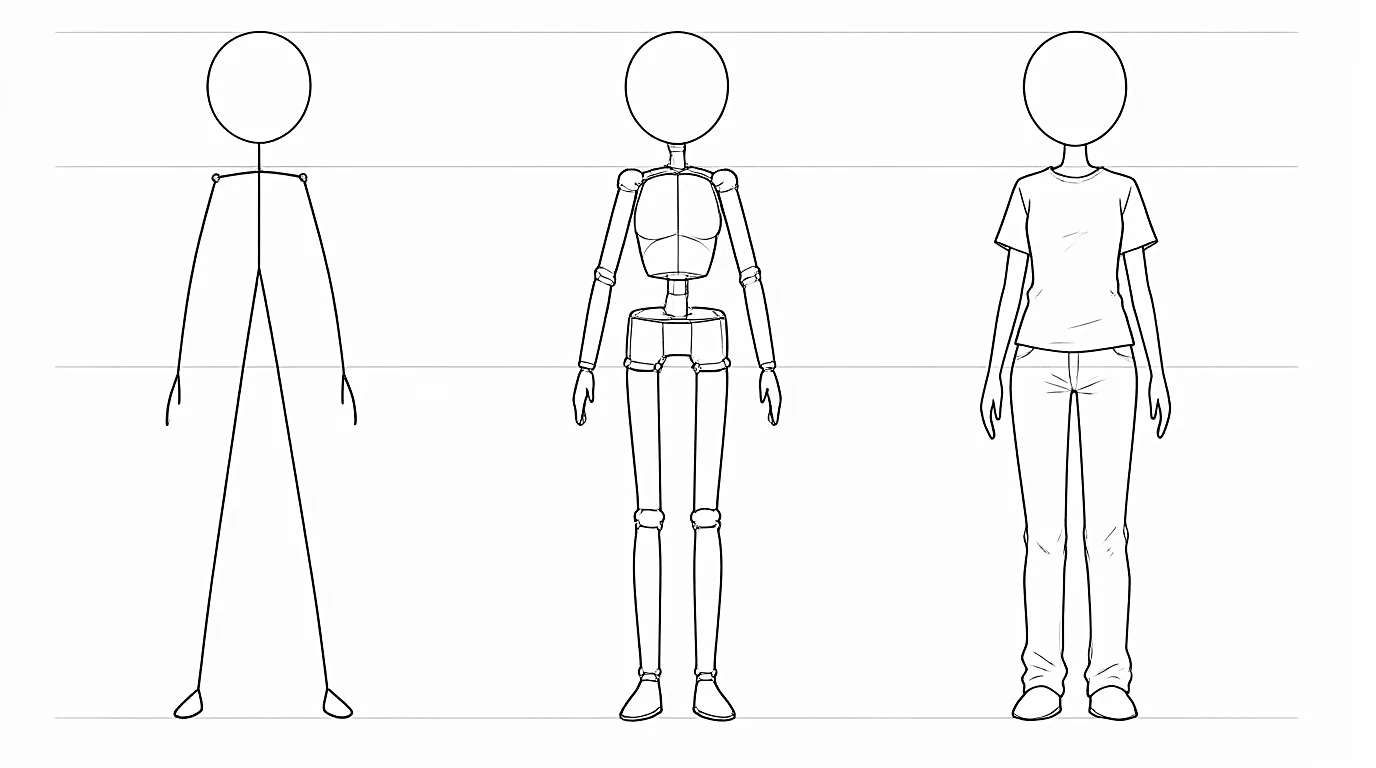
The whole order on the landmark lines: the stick figure, the volumes, then the outline and simple clothes. -
Step 2Draw the stick figure
Draw the head, then a line for the spine, the shoulder line a little below the chin and the hip line. Add the limbs as lines down to the landmarks, with a dot at each joint: shoulders, elbows, wrists, hips, knees and ankles.
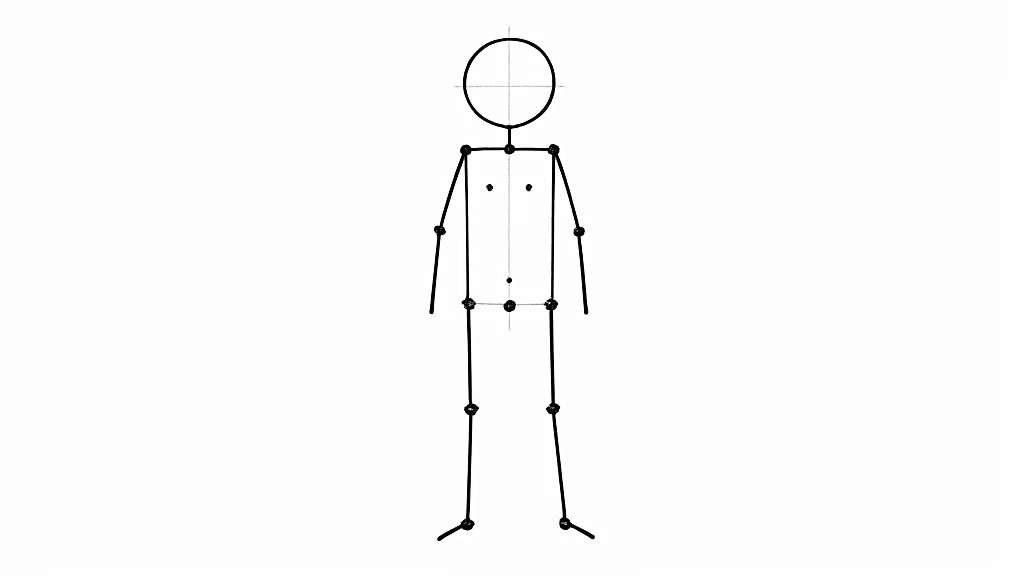
A stick figure with its joints: the spine, the shoulder and hip lines, and the limbs down to the landmarks. -
Step 3Build the torso with two volumes
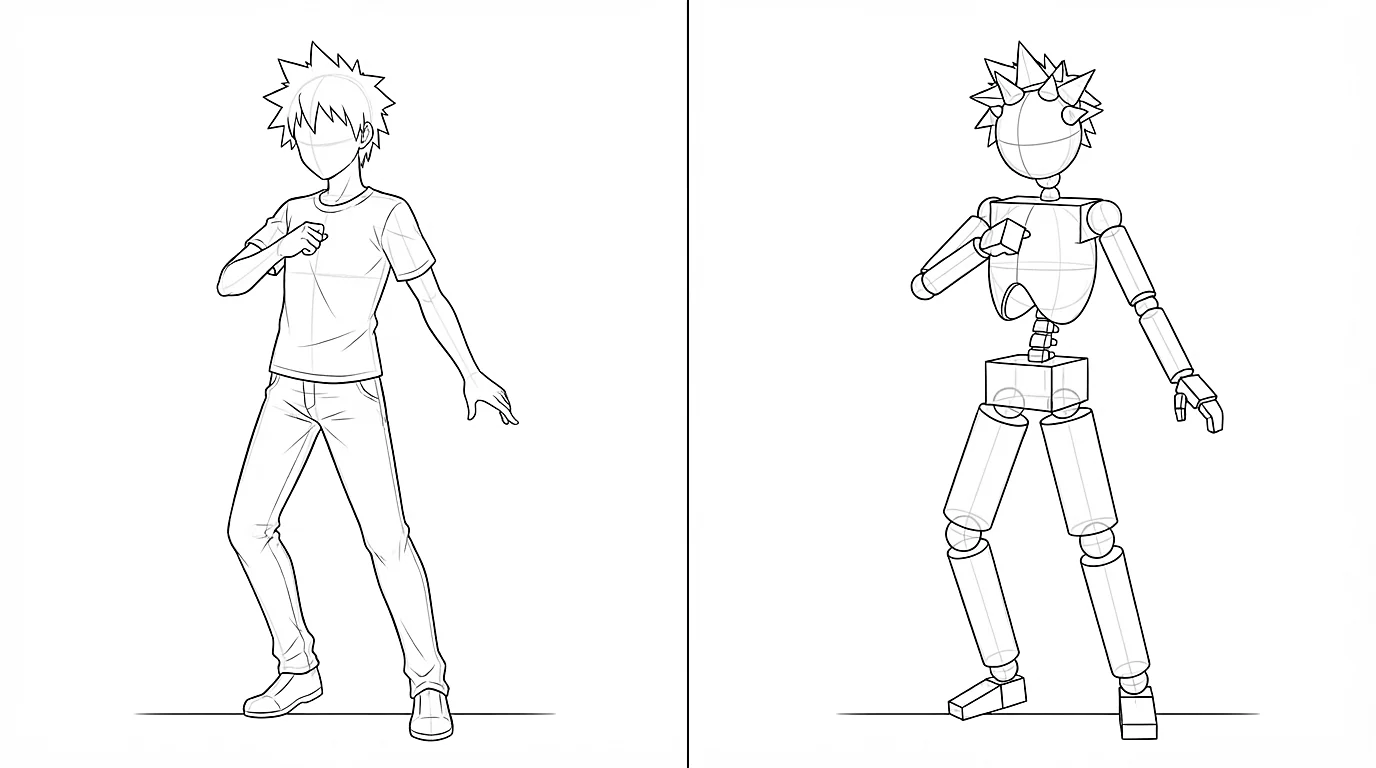
Draw a cylinder for the neck and the shoulder line. Then an egg, point down, for the rib cage, from the shoulders to the bottom of the ribs, a little above the navel. Under it, a slightly flattened box for the pelvis, from the navel to the crotch.
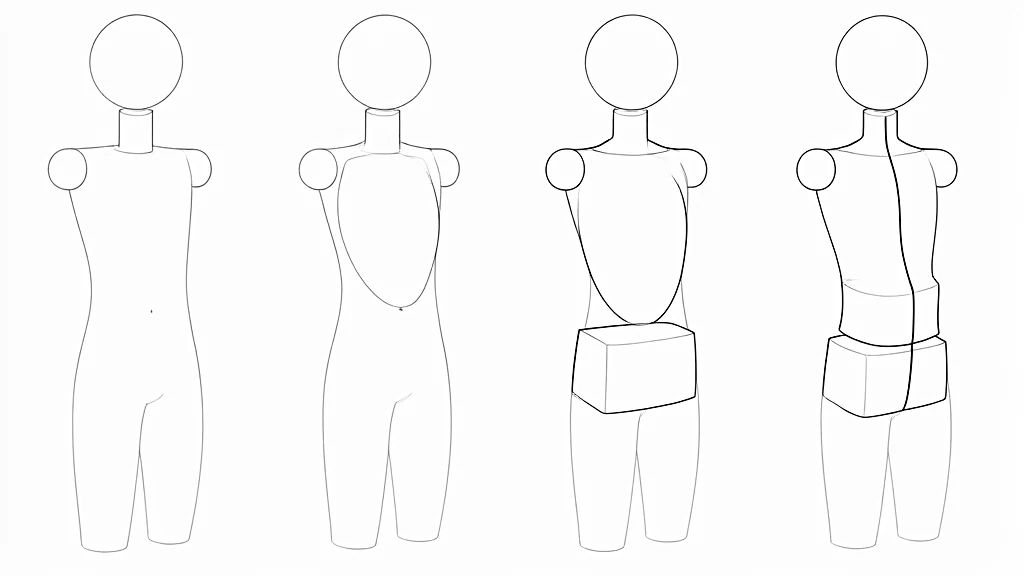
The torso in four stages: neck and shoulders, the egg of the rib cage, the box of the pelvis, then the belly and the spine. -
Step 4Connect them with the belly and the spine
Leave a gap between the rib cage and the pelvis: that is the belly, which bends and twists. A curved line, the spine, links everything at the back. Never stick the rib cage to the pelvis: without that gap, your character cannot bend.
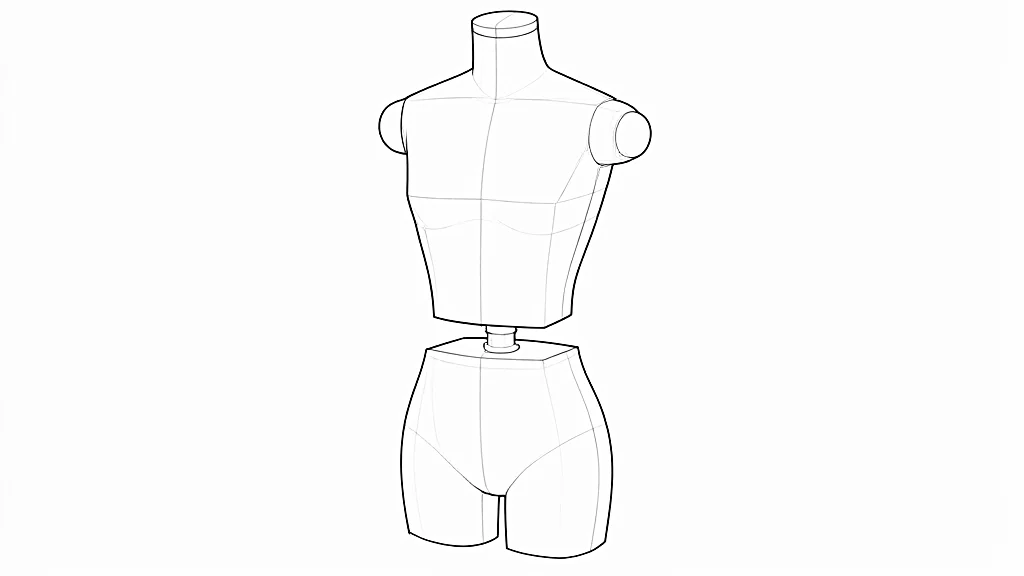
The rib cage and the pelvis stacked on the spine, with a gap between them for the belly. -
Step 5Build the arms
Put a ball at each end of the shoulder line: the whole arm turns around it. Then draw two cylinders of the same length, the upper one thicker, with a small ball at the elbow, at waist level, and a smaller one at the wrist. The hand stays a mitten for now.
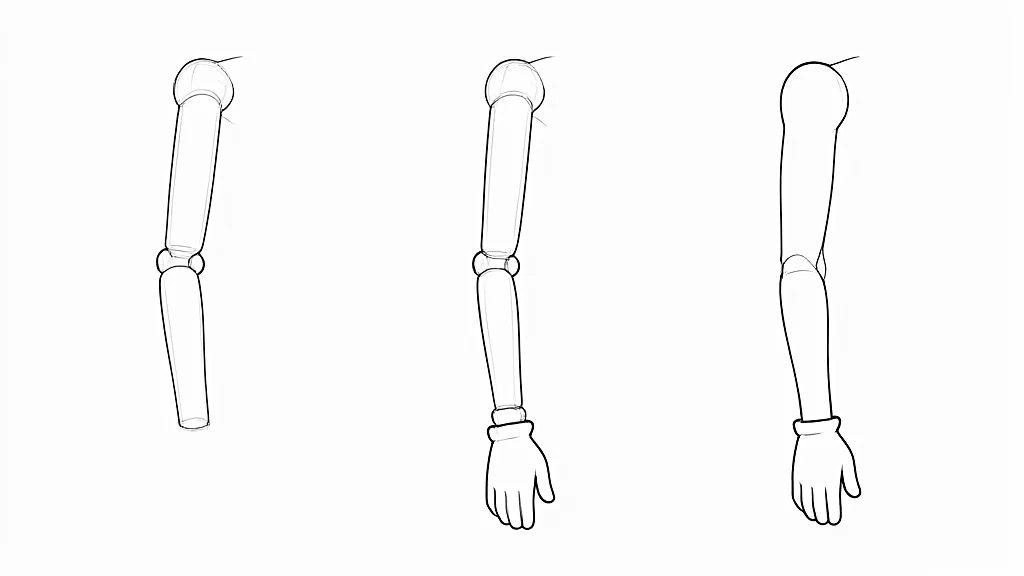
An arm in stages: the shoulder ball, two cylinders, the elbow and the wrist, then the outline. -
Step 6Build the legs and the feet
The legs start from a ball on each side of the pelvis, not from its bottom. Draw the thigh, the biggest cylinder in the body, down to the knee, halfway between the hip and the foot. The calf bulges at the back, then thins down to the ankle. The foot is a long triangle, almost as long as the head.
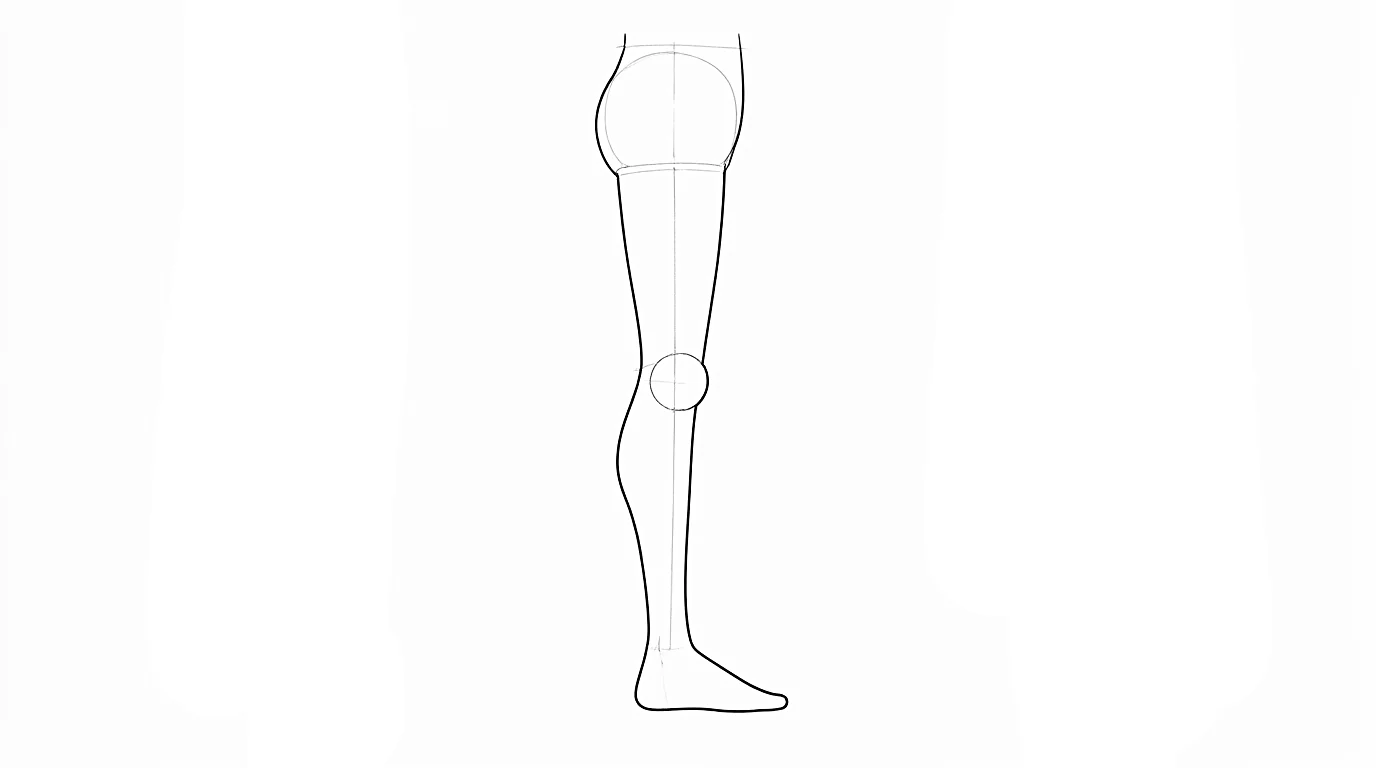
A leg from the side: the hip ball, the thigh, the knee, the calf thinning to the ankle, and the foot. -
Step 7Draw the outline and the clothes
Draw the outline over the volumes in soft curves: a round bump for the shoulder, the waist between the rib cage and the pelvis, never two parallel lines for a limb. Add a T-shirt and pants that follow the volumes, then erase the construction. Always draw a short line under the feet for the ground.
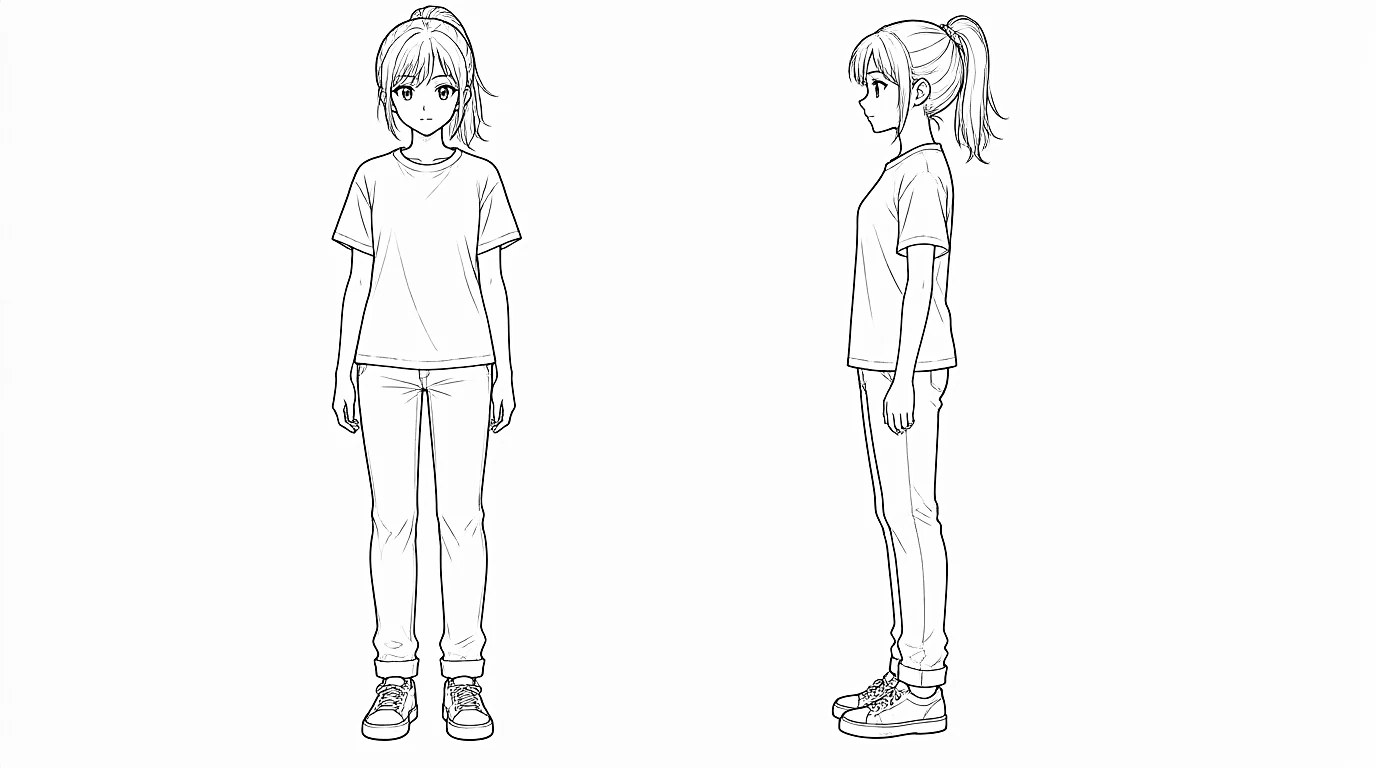
The finished character from the front and in profile, at the same heights.
Draw the whole front view first, then extend each landmark to the side to build the side view.
Male and female anime bodies
The mannequin is the same for every character; the volumes change. Exaggerate the differences first, then soften them: playing it too safe makes every body look the same.
Before drawing your character, choose their silhouette: it says who they are before their face does. Fill it in black: if your character is recognizable from the shape alone, it works.
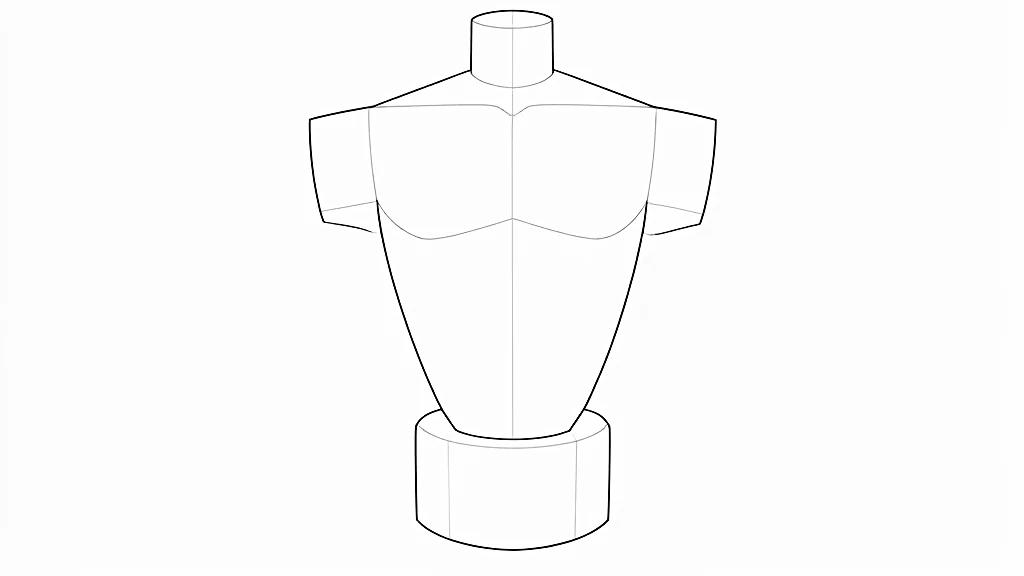
- Boy: a wide rib cage and square shoulders, a narrow pelvis: a V.
- Girl: a smaller rib cage, a slim waist, a pelvis as wide as the shoulders: an hourglass.
- Slim: narrow, elongated volumes and a thin neck.
- Heavy-set: a huge rib cage, a thick neck, shoulders rising almost to the ears.
- Silhouettes: the triangle for a strong hero, the hourglass for an elegant character, the rectangle for a simple, sporty or childlike one, the round for a gentle, funny or greedy one.
How to put the mannequin in a pose
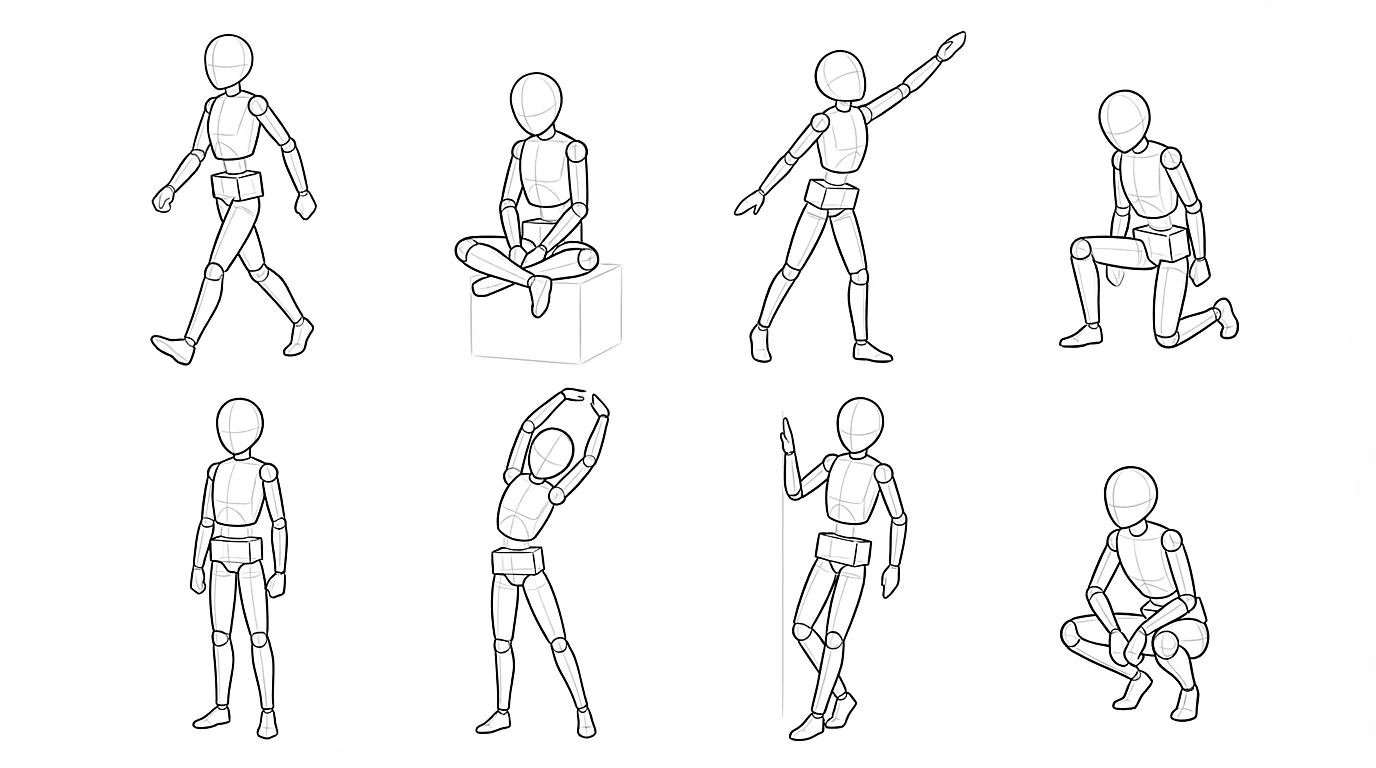
A mannequin standing straight looks stiff because real bodies never are. Tilt the rib cage and the pelvis in different directions, and the rest of the body follows: the spine curves, one shoulder drops, the weight moves onto one leg. When the arm bends, the upper cylinder passes in front of or behind the lower one, never end to end.
Draw many small mannequins in different situations: walking, sitting, leaning, kneeling, reaching. When a pose does not work, look at the rib cage and the pelvis first: they are almost always the ones facing the wrong way. The anime poses tutorial then adds the line of action, balance and foreshortening.
Draw a body from a reference
The fastest way to understand a pose is to rebuild it. Pick a photo or a drawing of a character, look for the rib cage, the pelvis and the joints, and draw them as a mannequin next to it. For a dressed character, find the torso under the clothes first: the rib cage and the pelvis, then the outline.
This exercise trains your eye to see volumes instead of outlines, and it shows you which part of a pose you do not understand yet. Our guide on drawing from reference explains how to use references without copying them.
Common mistakes when drawing anime bodies
Check the construction before you add any clothes: these mistakes are much easier to fix on a mannequin.
- Starting with the outline: without a construction, the proportions drift and the pose looks flat. Build the volumes first.
- Legs too short: the crotch sits in the middle of the body. Lengthen the legs, not the torso.
- A rigid torso: the rib cage stuck to the pelvis. Keep the belly's gap so the body can bend and twist.
- Legs that start under the pelvis: they start from a ball on each side of it.
- Limbs as two parallel lines: a leg is never a tube; a curve on one side answers a straighter line on the other.
Draw a mannequin in 3 everyday situations in 6 minutes: walking, sitting on a step and kneeling to pick something up, taking care of the hip, the knee and the ankle. Then draw your own character full body, from the front and in profile side by side. It is how week 3 of the SketchAI program ends.
Frequently asked questions
How do you draw an anime body for beginners?
Measure the body in heads, draw the landmark lines and a stick figure, then build the volumes: an egg for the rib cage, a box for the pelvis, the belly between them, cylinders for the limbs and balls for the joints. Draw the outline and the clothes over it, then erase the construction.
How many heads tall is an anime character?
Teens, the most common in manga, are 6 to 7 heads tall. Adults are 7.5 to 8 heads, action heroes up to 9, children 4 to 5 and chibis only 2 to 3.
Where is the middle of an anime body?
At the crotch: on a 7-head character, it sits at about 3.5 heads from the top, so the legs make half of the height. The navel is at 3 heads and the knees at 5.
What is the difference between male and female anime bodies?
Male bodies usually get a wide rib cage, square shoulders and a narrow pelvis, in a V. Female bodies get a smaller rib cage, a slim waist and a pelvis as wide as the shoulders, in an hourglass. The construction stays the same.
Why do my anime bodies look stiff?
Usually because the rib cage and the pelvis face the same way, stuck together, and the spine is straight. Leave a gap for the belly, tilt the two volumes in different directions and put the weight on one leg.
Keep learning
 Intermediate
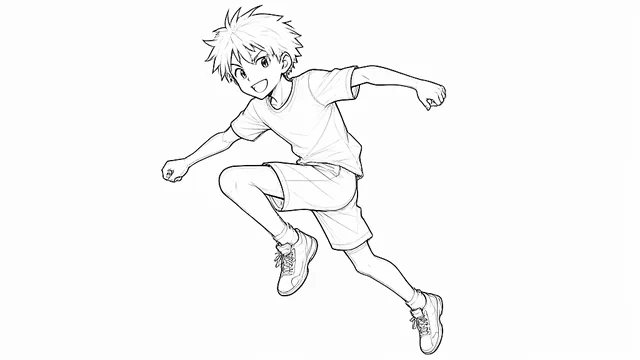
How to draw anime poses, step by step
Start with a line of action, build the mannequin on it, then add balance, depth and action.
 Intermediate
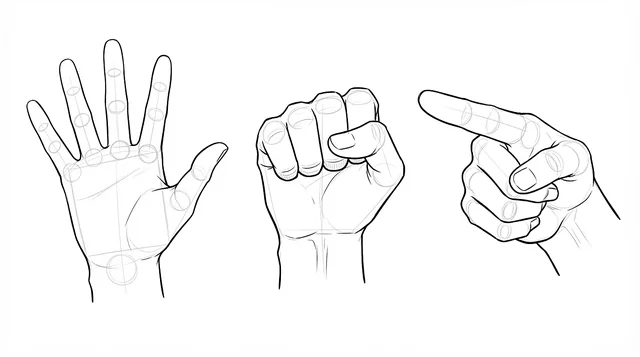
How to draw anime hands, step by step
A box for the palm, an arc for the knuckles and five fingers in segments: hands become simple.
 Beginner
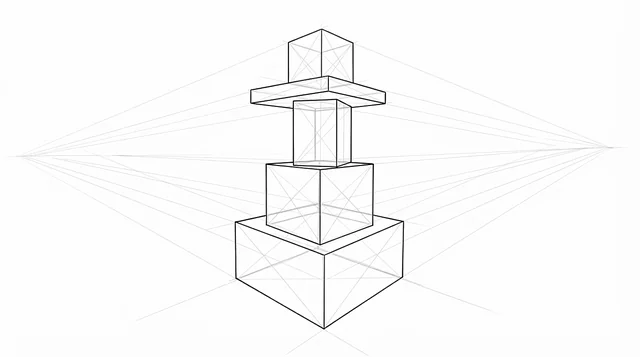
How to draw a box in perspective, step by step
One face, three edges for the depth, the hidden edges: then turn the box any way you like.