
Tutorial · Poses & movement
How to draw anime poses, step by step
To draw a dynamic anime pose, start with a single curve, the line of action, from the head to the foot that carries the weight. Build the mannequin on it: the spine follows the curve, the shoulders and the hips tilt against each other, the limbs carry it to the end. Then check the balance and the silhouette, and push the pose further than feels possible.
- Intermediate
- 40 min practice
- 8 min read
- Updated
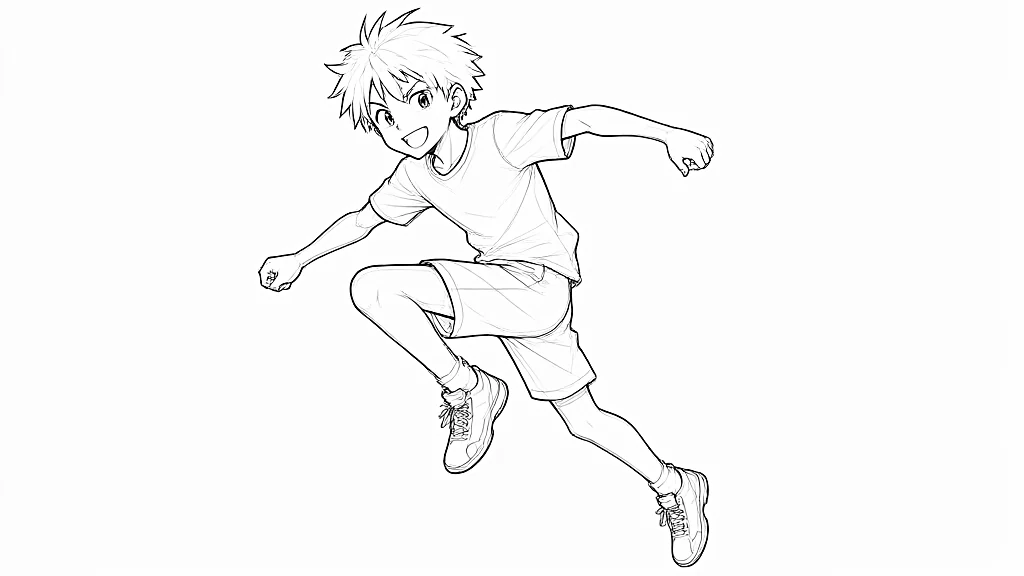
You'll need
- HB pencil
- 2B pencil for the final lines
- Eraser
- A timer and photos of people moving
Key takeaways
- Start every pose with a line of action, even before the head: one curve from the head to the foot carrying the weight.
- The shape of the line sets the energy: C to push or lean, S for a walk or a relaxed pose, a big arc for action.
- Tilt the shoulders and the hips differently, and check that the weight sits over the foot on the ground.
- Fill the pose in black: if the silhouette still reads, the pose works.
On this page
Why poses look stiff
A well-built mannequin can still look stiff. The usual causes are always the same: a straight spine, shoulders and hips perfectly level, the weight spread evenly on both legs and the arms mirroring each other. Real bodies are almost never symmetrical, and manga exaggerates that even more.
A good pose reads at a glance, even without the face or the details. The secret is not perfect anatomy: it is a clear idea, a simple movement and a believable weight. Sum up the pose in one sentence first, like "he leaps forward" or "she hesitates to leave": if you cannot say it simply, the drawing will stay vague.
How to draw an anime pose step by step
Have a reference at hand, a photo or yourself in a mirror, and draw lightly. Each step should take seconds, not minutes: thirty seconds are enough to know whether a pose works, and if it fails as a sketch, details will not save it.
-
Step 1Catch the movement
Decide what the character is doing and where the energy goes: a jump goes up and forward, a punch goes toward the target, a slouch sinks down. Try the idea in a few quick sketches of a few seconds each, before committing.
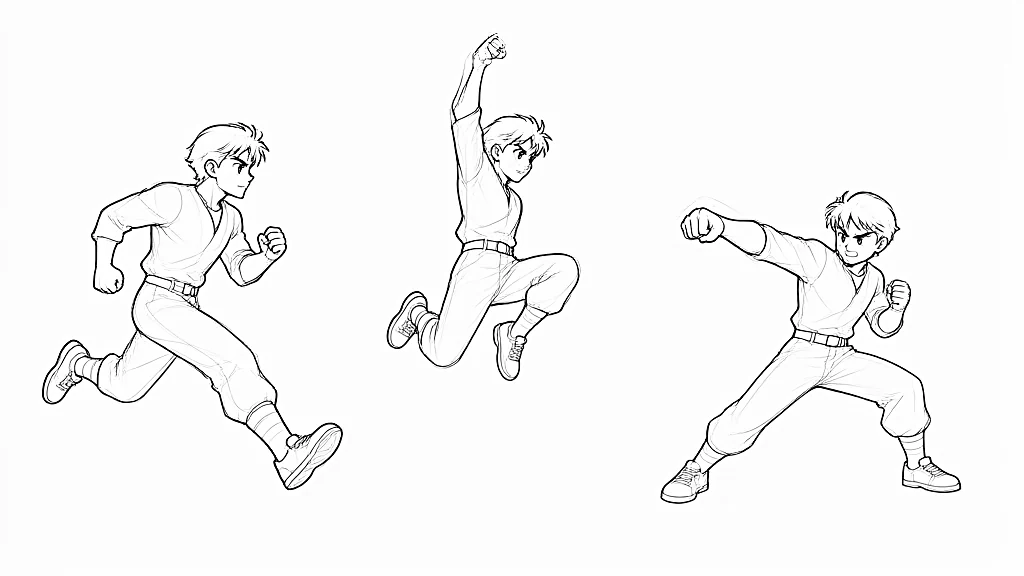
Three actions caught in a few seconds each: a run, a jump and a punch. -
Step 2Draw the line of action
Draw a single curve from the head to the foot that carries the weight. It is the movement of the whole pose. Even a calm standing character leans a little: avoid the perfectly straight line.
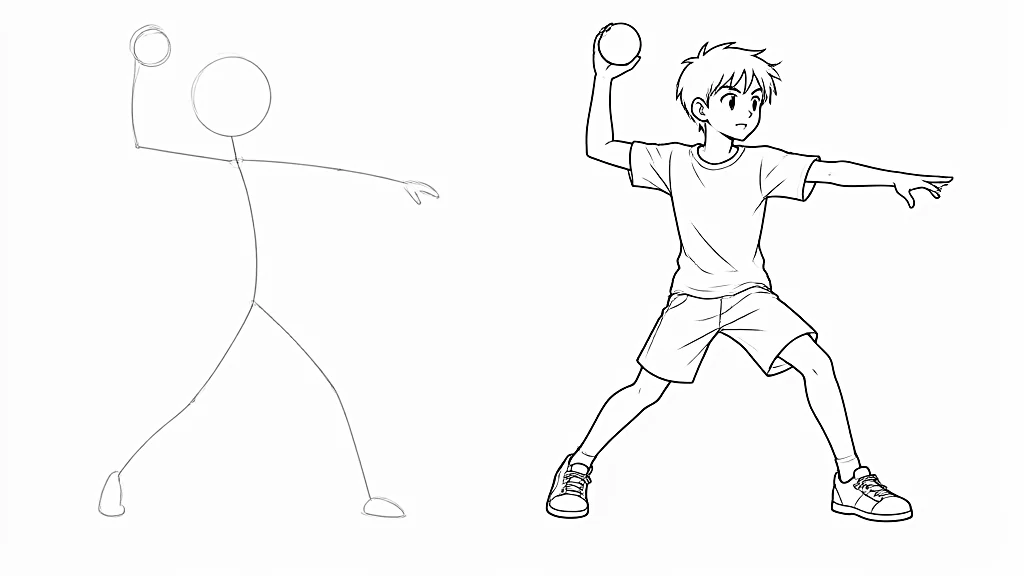
The line of action first, then a stick figure on it, then the character: the curve runs from the head to the supporting foot. -
Step 3Place the big volumes on the curve
Draw the spine along the line, then place the head, the rib cage and the pelvis on the curve. Keep them simple: a sphere, an egg and a box are enough to see whether the pose works.
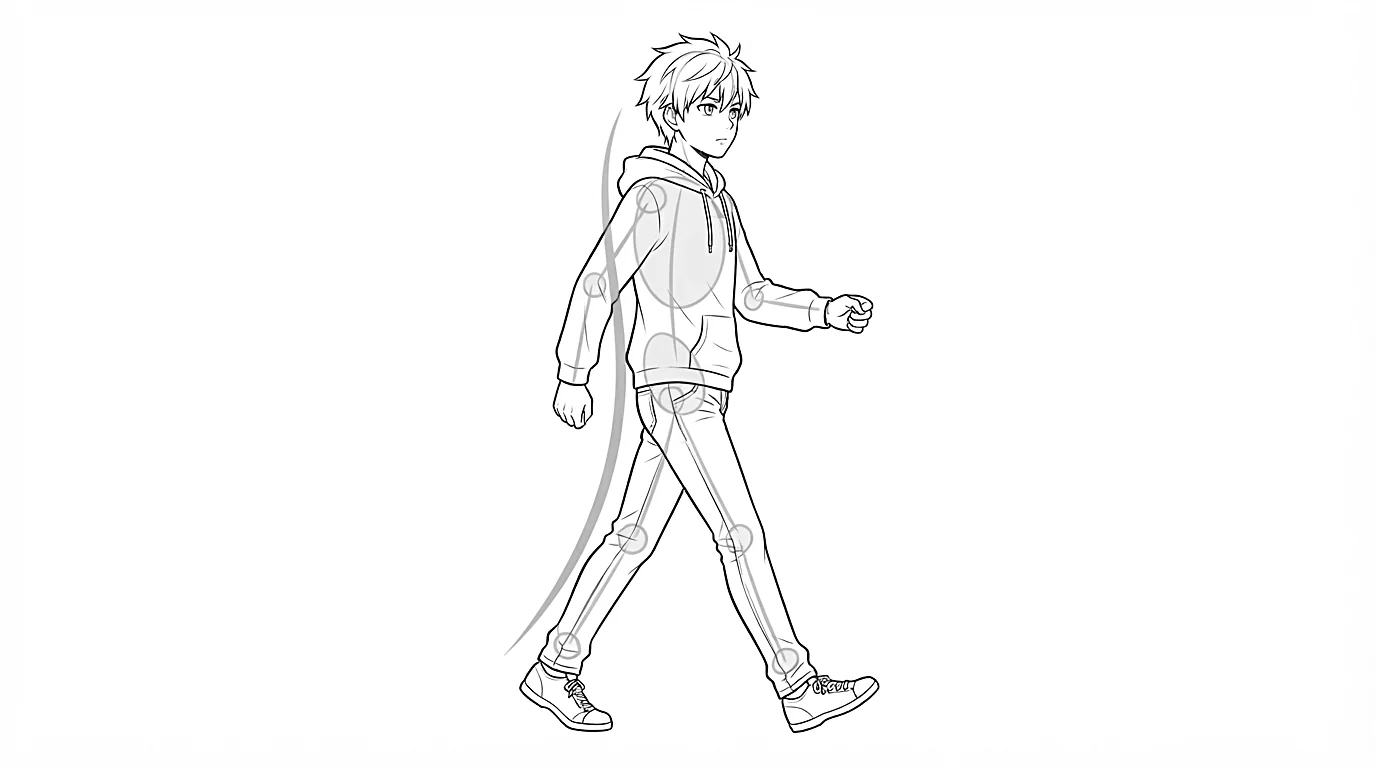
A walking character built on a curved line of action, with the volumes and the joints under the clothes. -
Step 4Tilt the shoulders and the hips
Draw a line through the shoulders and another through the hips, crossing the line of action, and tilt them differently. When the weight moves onto one leg, the hip rises on that side and the shoulders tilt the other way: that shift is enough to wake up a standing pose.
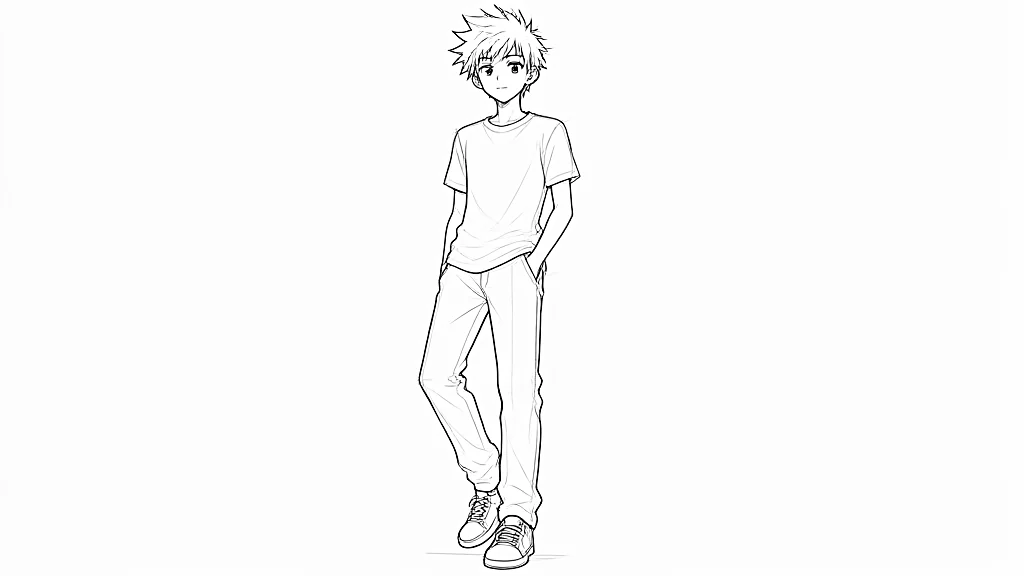
Opposing axes: the shoulder line and the hip line tilt in different directions, with the weight on one leg. -
Step 5Add the legs, then the arms
Start with the leg that carries the weight: the rest of the body organizes itself around it. Then add the arms, which balance the pose. Don't let both arms or both legs do the same thing: shift the heights and change the angles.
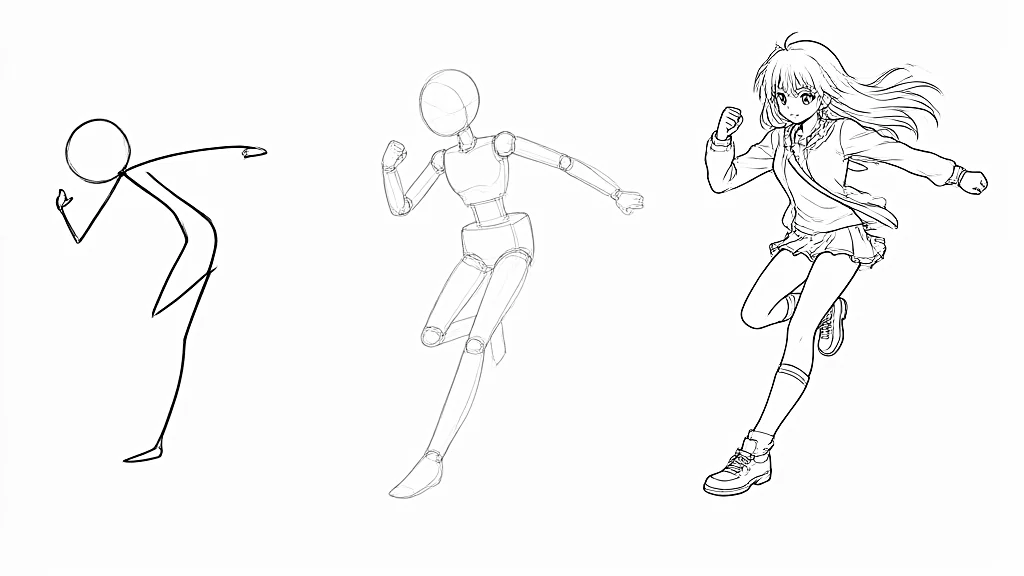
The same pose as a line, then as a jointed mannequin, then as a finished character. -
Step 6Check the balance
Imagine a plumb line dropping from the hollow of the neck. If it lands between the feet, or over the supporting foot, the character stands. If it lands outside, the character must be walking, running or falling, and the pose must show it.
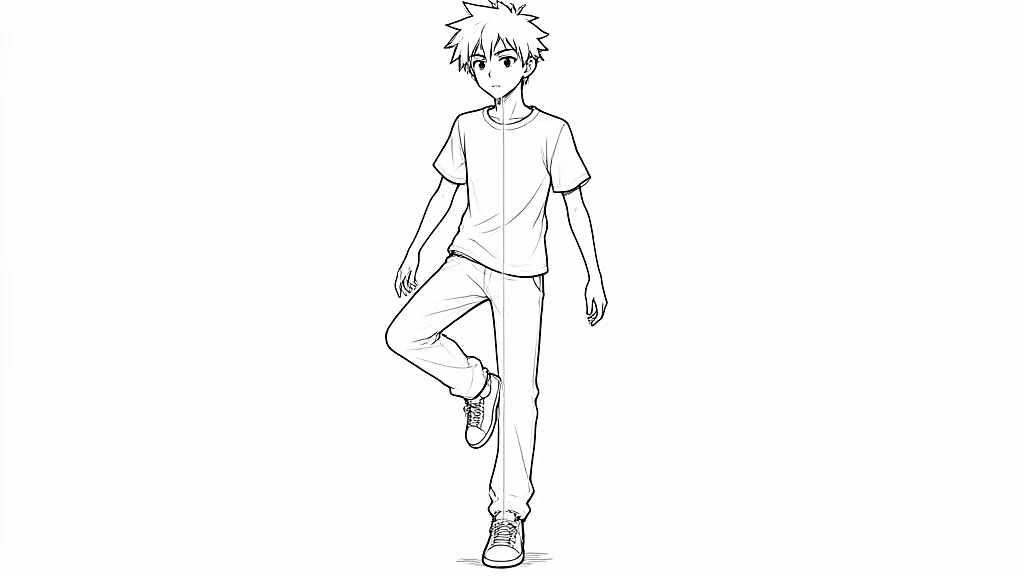
Balance on one leg: the weight of the body sits above the foot on the ground. -
Step 7Foreshorten what comes toward you
An arm pointing at the viewer looks shorter because it goes into depth. Build it with its axis and short, overlapping cylinders rather than trusting its apparent length, and draw the hand bigger.
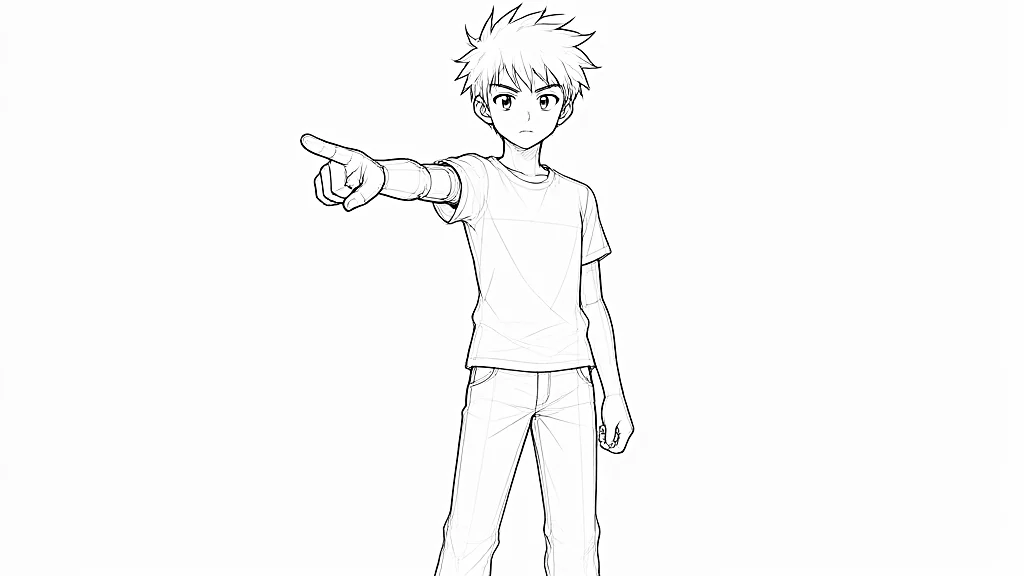
Foreshortening: the arm pointing at the viewer is short, and the hand looks bigger. -
Step 8Draw the character and check the silhouette
Draw the body, the clothes and the face over the mannequin, keeping the line of action visible in the final lines: the back and the supporting leg follow it. Fill the pose in black in your head: if the action no longer reads, move the arms and legs away from the body.
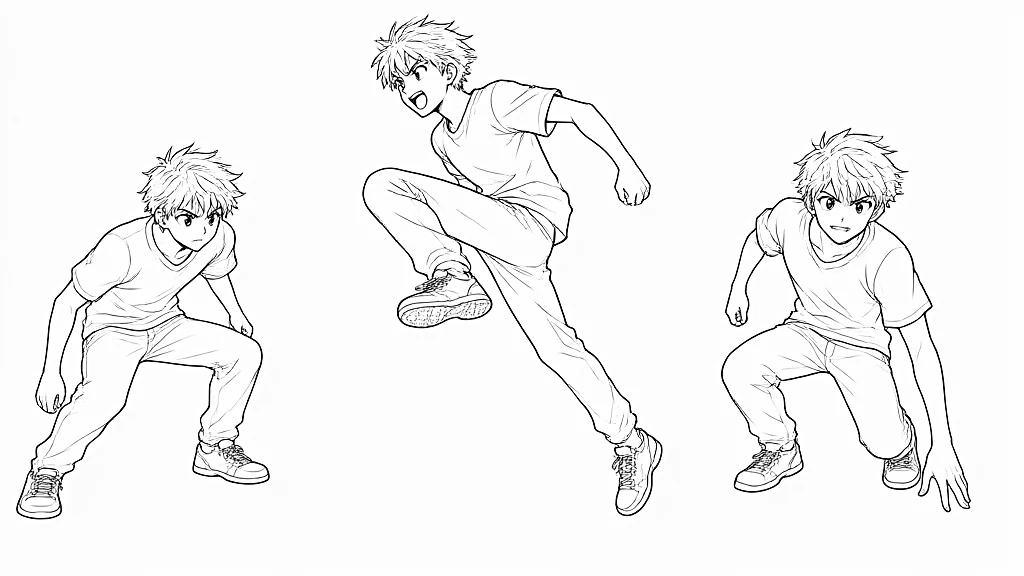
One character in three poses that tell a little story: getting ready, jumping, landing.
Hair and clothes carry the movement on: make them follow the line of action, flying the opposite way to the character.
The four lines of action
The shape of the line sets the energy of the pose. The more curved the line, the more energy the pose has. Pick the line before anything else, then build the mannequin on it.
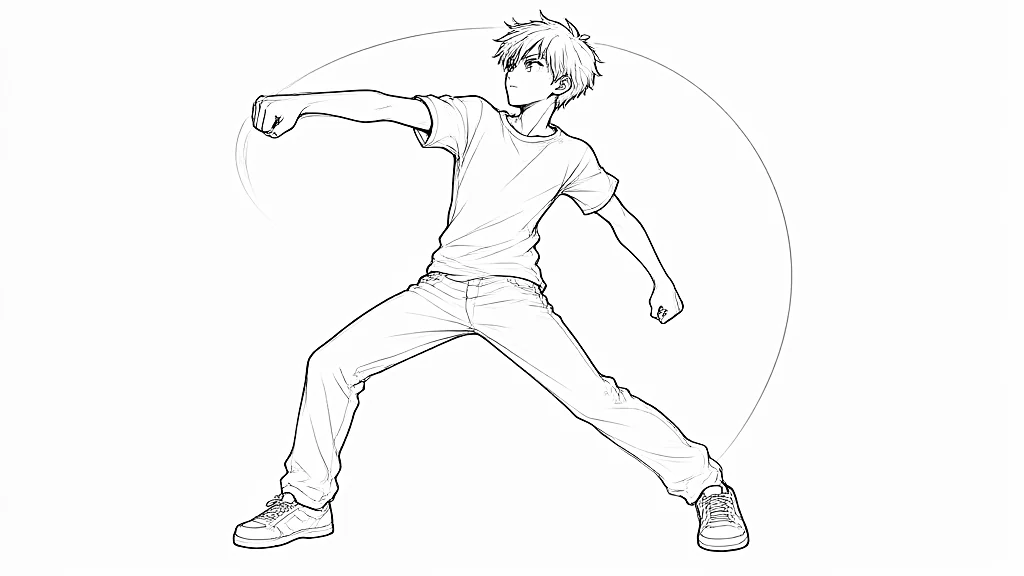
- The C: one curve. The character pushes, pulls or leans.
- The S: two curves. A walk, an elegant pose, a relaxed body.
- The I: almost straight. A calm character, or one stretched with their whole body, as in a jump straight up.
- The big arc: a very arched C. Action, a strike, momentum.
How to draw foreshortening in a pose
Foreshortening is what makes a limb come at the reader. A limb coming toward you is built in four stages, with cylinders: its axis, very short since it points at you; ellipses at the ends of the cylinders, rounder as they face you; what is near drawn big, so a hand reaching at you can be as big as the head; and the front cylinder drawn first, hiding the start of the one behind.
Don't be afraid to exaggerate: a timid foreshortening just looks wrong, a pushed one looks powerful. The foreshortening tutorial goes further with legs and views from above and below.
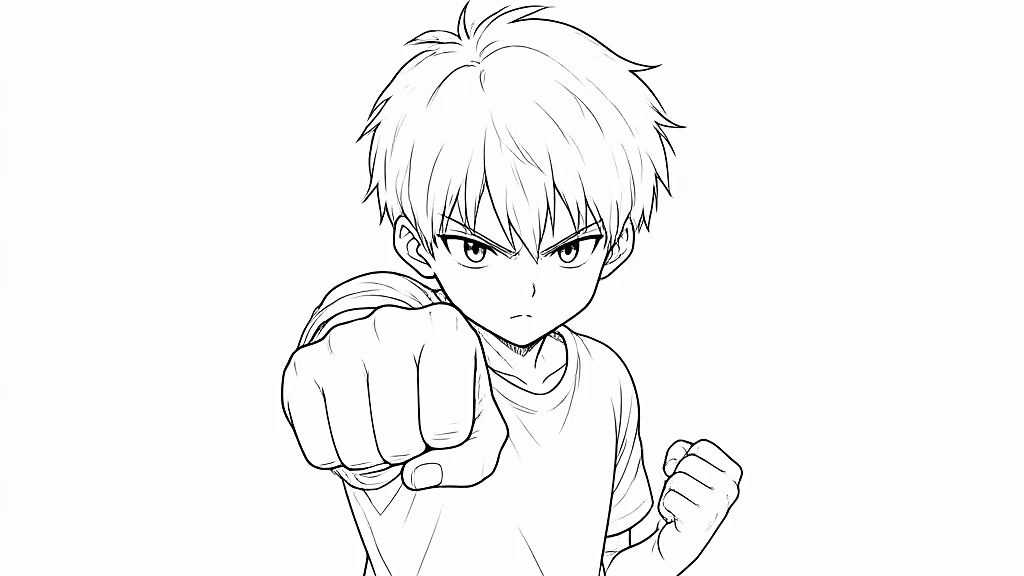
- An arm reaching at you: a huge hand, the arm almost hidden behind it.
- A leg coming forward: a kick at you, the sole bigger than the torso.
- Seen from above: a big head and shoulders, tiny feet at the bottom.
- Seen from below: huge feet and legs, a tiny head at the top.
How to draw action and fighting poses
An action pose pushes everything to the max. Pick the key moment: not the middle of the move, but the instant just before, with the arm pulled back, or just after, with the punch flying. Push the line of action further than is possible, and lean the whole pose on a diagonal: it looks in motion, where a vertical pose looks still.
In every action, something goes back to balance what goes forward. Keep the silhouette readable: if you filled the pose with black, you should still understand the action.
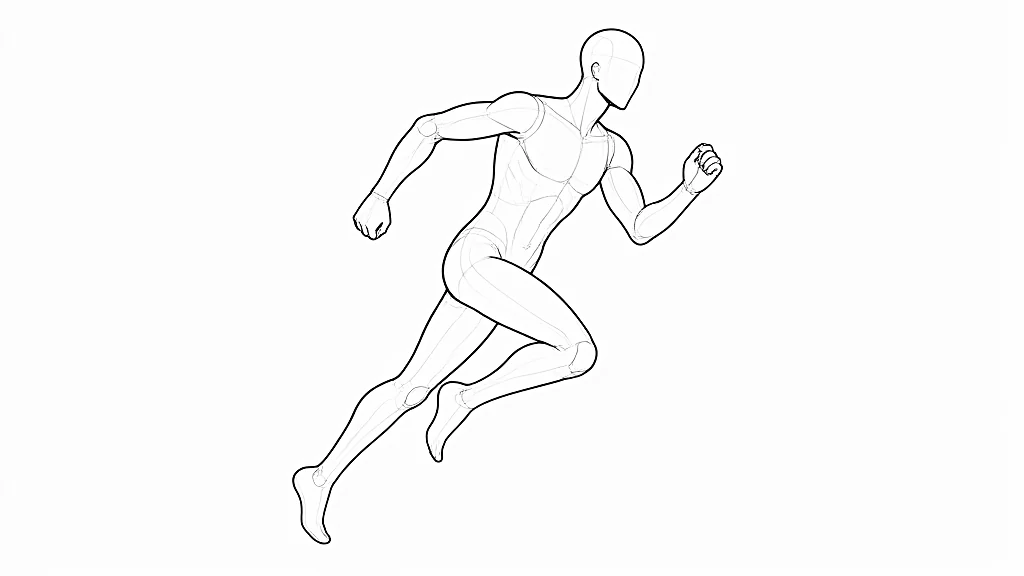
- Running: the body leaning forward, one arm and the opposite leg in front, one foot in the air.
- Jumping: the body stretched like a bow, the legs tucked or stretched behind.
- The punch: the striking arm and its shoulder go forward, the other arm pulls back for balance.
- The kick: the supporting leg bends, the chest leans away from the kicking leg.
- The guard: legs apart and bent, weight low, shoulders forward: the dropped pelvis gives the feeling of stability.
Everyday poses to practice
Pick one family of poses per session and draw it ten times with small variations. A stiff pose can often be fixed in seconds: tilt the head, shift the shoulders and bend a knee.
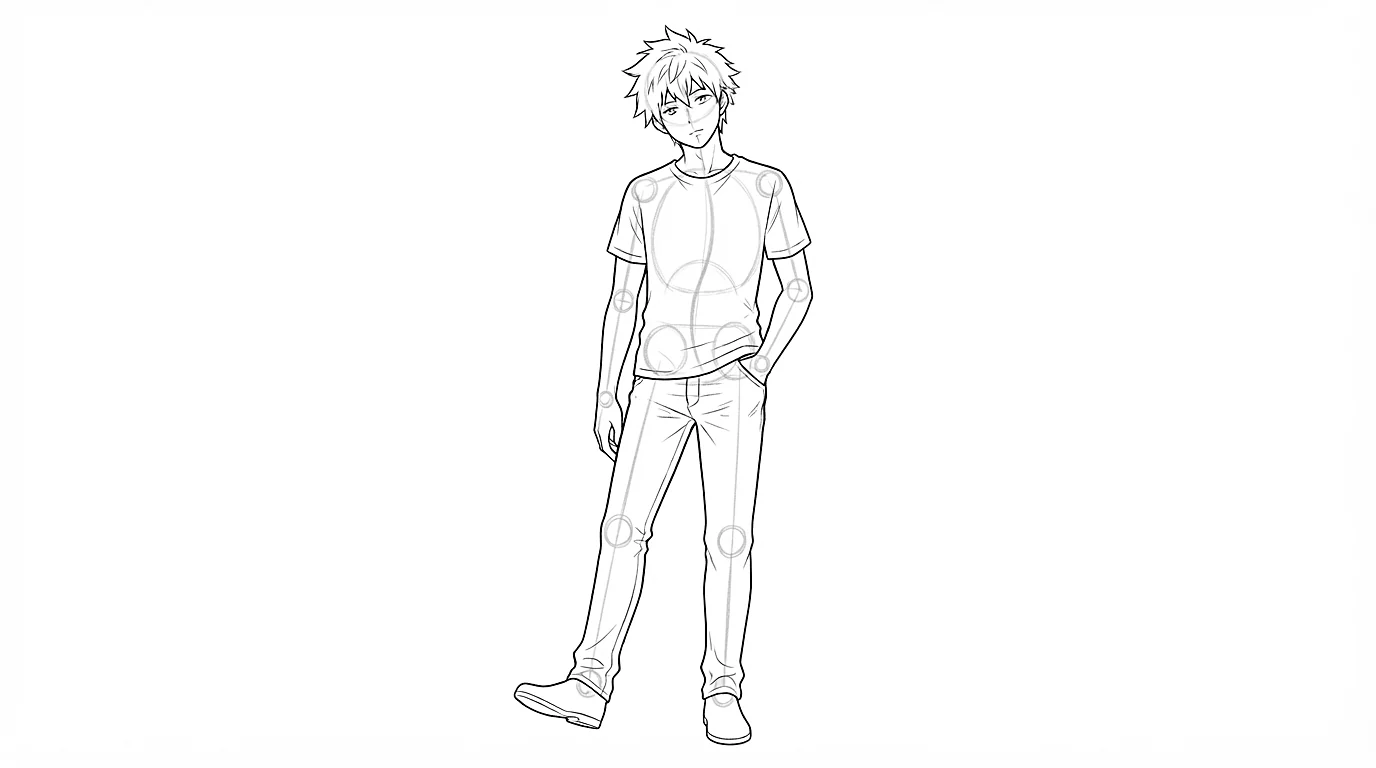
- The relaxed standing pose: weight on one leg, opposing shoulders and hips, one hand in a pocket.
- Walking: one leg in front, one behind, the back knee bent and the heel lifted, the arms swinging opposite the legs.
- Sitting, relaxed: the weight rests on the pelvis, the back rounds, the head tilts and one leg does something different from the other.
- Looking back: the head and the shoulders turned one way, the hips the other.
How to use references for poses
References are not cheating: they show you how a body really bends. Look at the reference for a minute, find its line of action, its shoulder and hip lines and the supporting foot, then draw only those. Copying every outline would teach you less. Strike the pose yourself in a mirror or a selfie, too: you will feel where your weight goes.
Alternate quick sketches from photos with poses from imagination. After a few weeks, the poses you invent start to borrow the life of the ones you studied. Our guide on drawing from reference gives a full routine, and the anime body tutorial the mannequin under every pose.
Common mistakes when drawing anime poses
Check these before you add the face and the clothes: they are much easier to fix on the line of action and the mannequin.
- No line of action: the spine is straight, so the body looks frozen. Start with the curve.
- Level shoulders and hips: tilt them in opposite directions when the weight is on one leg.
- Symmetrical arms and legs: vary the angles and the depth of each limb.
- A character that tips over: the weight is not above the supporting foot. Check the balance before adding details.
- A timid action: the middle of the move, on a vertical. Pick the moment before or after, and lean the pose on a diagonal.
Set a timer and draw 4 poses in 30 seconds each from photos or people around you, only the line of action. Then draw one character in 3 poses that tell a little story, before, during and after a jump, starting with the 3 lines of action side by side. It is how week 4 of the SketchAI program starts and ends.
Frequently asked questions
How do you draw anime poses for beginners?
Start with a line of action from the head to the supporting foot, place the head, the rib cage and the pelvis on it, tilt the shoulders and hips differently, add the legs then the arms, and check the balance. Draw the details last.
What is a line of action in drawing?
It is a single curve that sums up the movement of the whole body, from the head to the foot carrying the weight. A C pushes or leans, an S walks or relaxes, an almost straight I stretches, and a big arc strikes.
How do you make a pose look dynamic?
Curve the line of action more, tilt the shoulders and hips differently, make the limbs asymmetrical, lean the pose on a diagonal and use foreshortening for anything that comes toward the viewer.
How do you draw anime fighting poses?
Pick the moment just before or just after the blow, push the line of action, send the striking arm and its shoulder forward while the other arm pulls back, and keep the silhouette readable.
Should I use references to draw poses?
Yes. Study the line of action, the tilt of the shoulders and hips and the balance in a reference, then draw the pose from those, instead of copying every outline.
Keep learning
 Beginner
How to draw an anime body, step by step
Measure the body in heads, build it with simple volumes, then draw the outline and the clothes.
 Intermediate
How to draw anime hands, step by step
A box for the palm, an arc for the knuckles and five fingers in segments: hands become simple.
 Beginner
How to draw a box in perspective, step by step
One face, three edges for the depth, the hidden edges: then turn the box any way you like.