
Lesson · Making manga
The manga page: panels, reading order and balloons
A page is a drawing that tells a story over time. The reader must know where to look and in what order, without ever wondering. A few simple rules are enough to get there.
- Intermediate
- 15 min practice
- 3 min read
- Updated
Key takeaways
- Draft your page tiny first, as stamp-sized thumbnails: you see the rhythm far better than at full size.
- A panel that bleeds to the edge of the page feels bigger and more immersive than its real size.
- Take a page from your favorite manga and trace only its panels: you'll see its skeleton.
- Write the balloon text before drawing: it often decides the size of the panels.
On this page
Laying out a page
-
Step 1Reading order
A Japanese manga reads right to left and top to bottom: you start with the top-right panel. Choose a direction and keep it for your whole story.
-
Step 2Horizontal tiers
Split the page into 3 to 5 tiers, then split each tier into panels. The reader finishes a tier before moving on to the next.
-
Step 3Size means importance
A big panel for a strong moment, small panels for what goes by quickly. A page of equal panels lacks rhythm.
-
Step 4Clear gutters
Leave a regular gap between panels, wider between tiers than between the panels of a tier. That gap is what guides the reading order.
Draft your page tiny first, as stamp-sized thumbnails: you see the rhythm far better than at full size.
Balloons
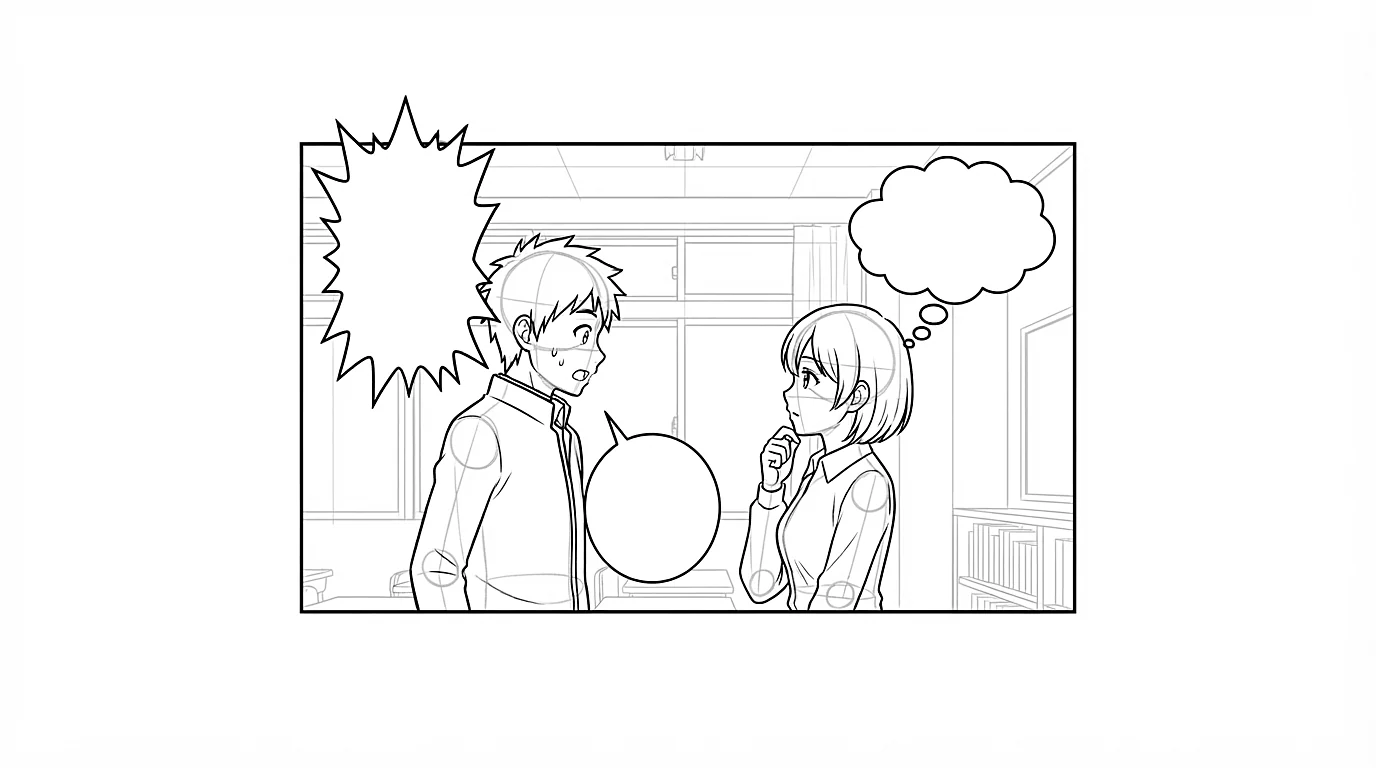
- Place the balloons before drawing: they take up space and must hide neither a face nor an action.
- Balloons read in the same order as the panels: the first one at the top right, or the top left, depending on your reading direction.
- The balloon's tail points toward the speaker's mouth, without touching it.
- A round balloon to speak, a cloud to think, a spiky one to shout.
- Little text per balloon: if one overflows, split it in two.
Making the reading flow
-
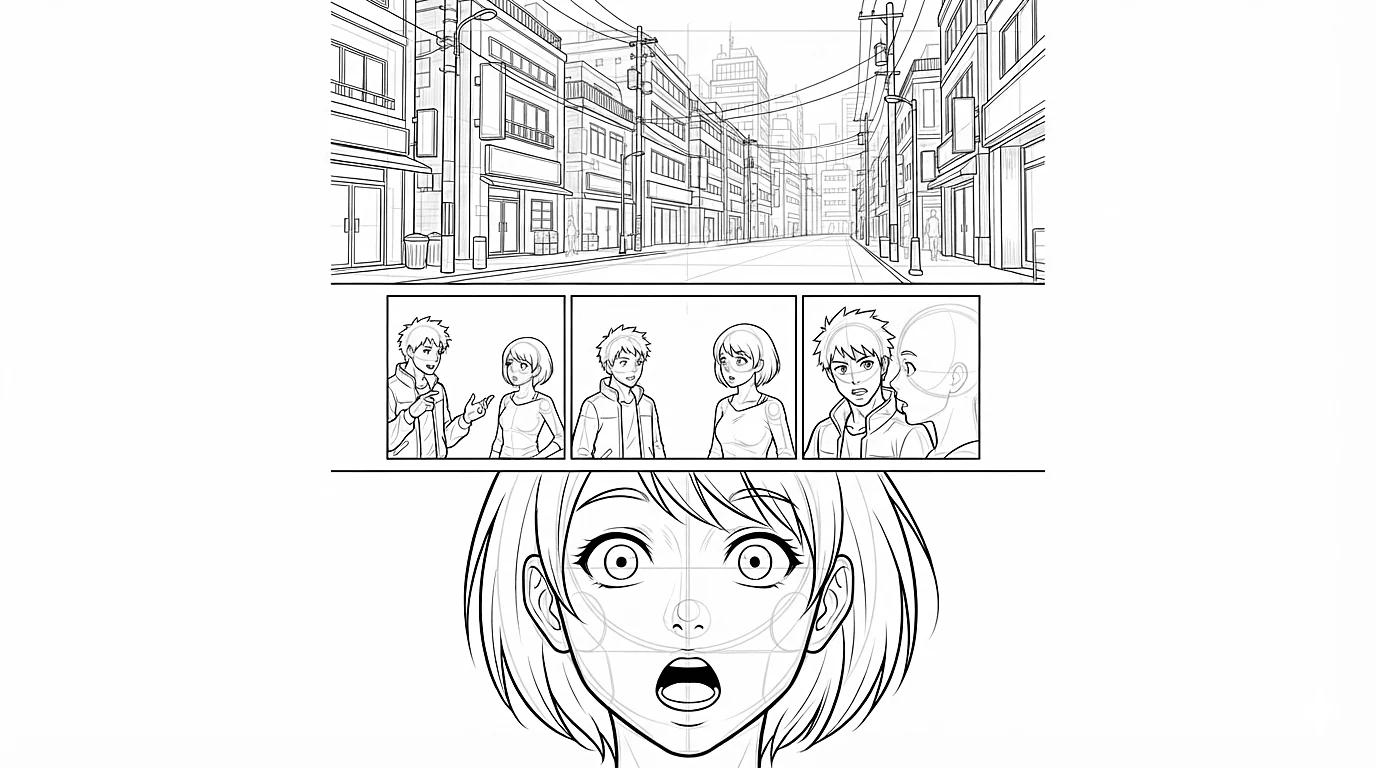
Step 1A wide shot to set the scene
Open a scene with a wide panel that shows where we are and who is there. Only then move closer.
-
Step 2The 180-degree rule
If a character faces left in one panel, keep them on the left in the next while they talk to the same person. Otherwise the reader gets lost.
-
Step 3The last panel
The panel at the bottom of the page makes the reader want to turn it: a question, a surprise, a look.
Rhythm and action panels
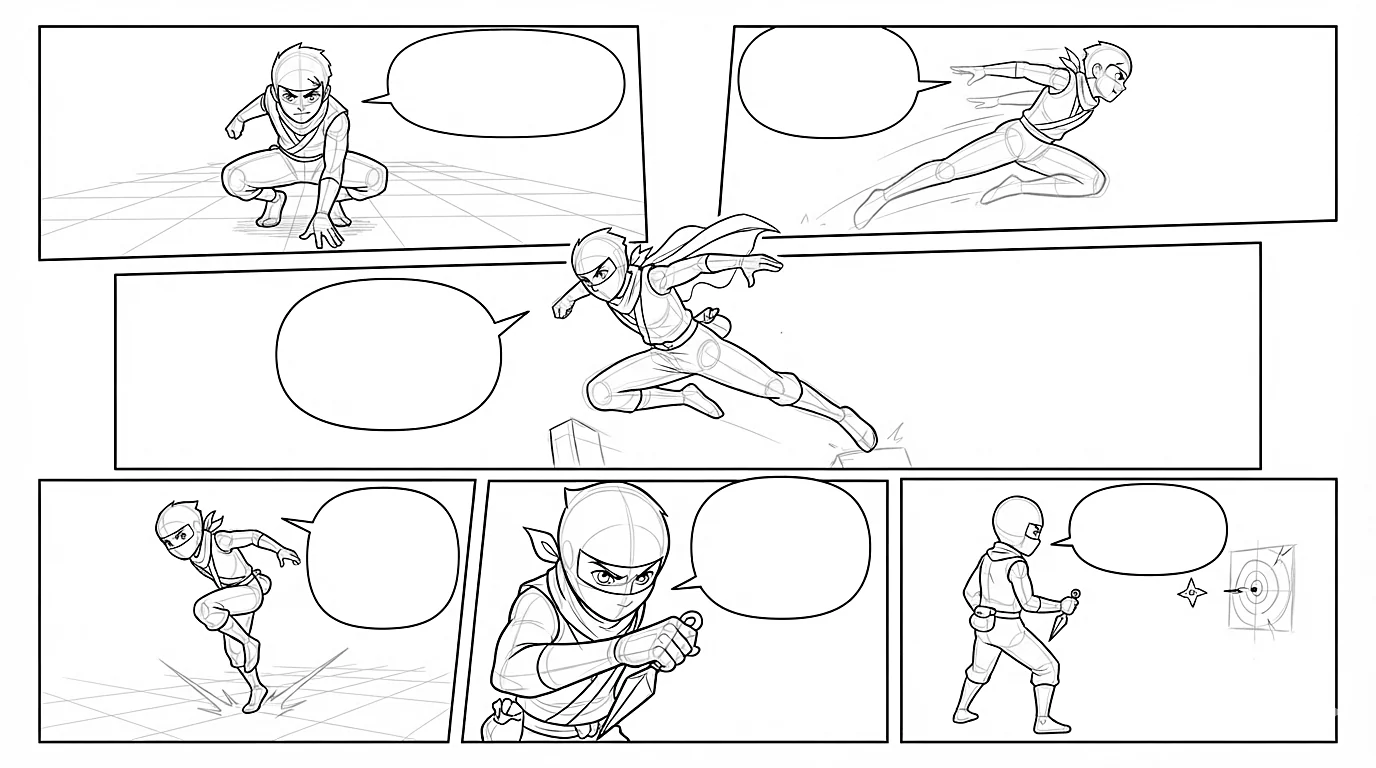
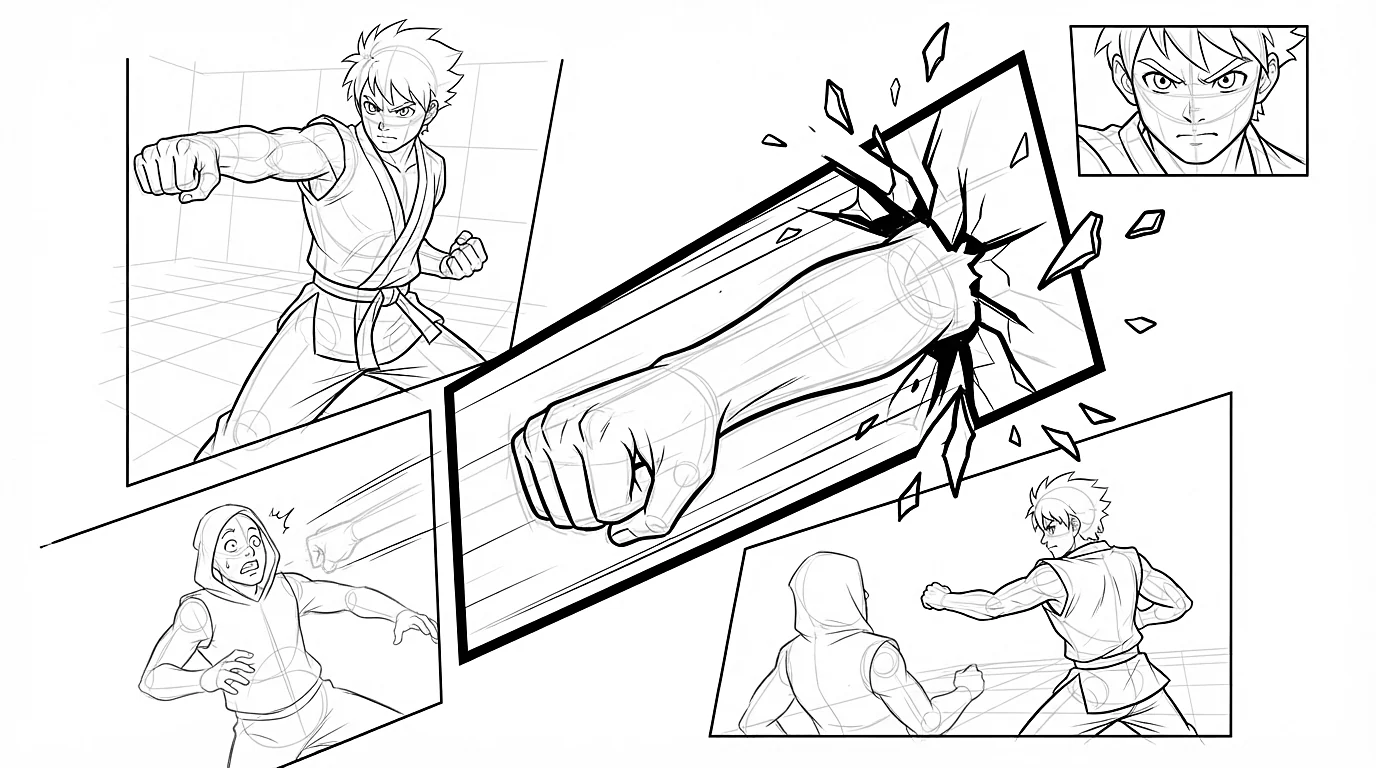
In an action scene, the layout itself becomes an effect: it speeds time up or slows it down.
-
Step 1Slanted panels
Slanted borders add tension and speed. Keep them for action: in a calm scene, they are tiring.
-
Step 2Breaking out of the panel
Let a fist, a sword or a character spill over into the next panel: the action seems to burst out of the page.
-
Step 3Slowing time down
Several small panels on the same instant (a look, a hand, a drop of sweat) stretch the moment just before the impact.
-
Step 4The full page
Save a panel that takes the whole page, or a double spread, for the strongest moment of the chapter. One per chapter, no more.
A panel that bleeds to the edge of the page feels bigger and more immersive than its real size.
The coach's tips
- Take a page from your favorite manga and trace only its panels: you'll see its skeleton.
- Write the balloon text before drawing: it often decides the size of the panels.
- Alternate shots: wide, medium, close-up. Three panels in a row with the same framing feel frozen.
- Avoid panels that could be read in two orders: if you hesitate, the reader will too.
- Put characters from the app's catalog in a little four-panel story: it's the best exercise to start with.
Practice right now
Once the lesson is read, draw this exercise: it takes about 15 minutes.
Make a yonkoma, a story in four vertical panels: a setup, a development, a twist and a punchline. Keep it simple, stick figures are fine.
Keep learning
 Intermediate
Inking: confident lines, and line weight that builds volume
Confident lines, and line weight that builds volume.
 Intermediate
Composition and framing: where to place the subject and how to frame it
Where to place the subject and how to frame it.
 Intermediate
Black, white and screentones: solid blacks, screentones and black-and-white readability
Solid blacks, screentones and black-and-white readability.